Strawberry Banana Muffins

I had planned on making a banana quick bread this morning but I was afraid the family will be tired of the plain banana quick bread.  It suddenly dawned on me that I had some frozen strawberries stored away.  So the banana quick bread turned into strawberry banana muffins.  I decided to make them into muffins instead of a loaf bread so I didn’t have to spend time slicing the loaf and washing additional utensils.

The muffins turned out moist, sweet and a little tangy.  They make for a good breakfast and snack.  If you have little ones who are always hungry and looking for food, you can try making these muffins.  They are easy to make and ready in no time.  No major prep required and you probably need to take 20 minutes to put them all together, another 20 minutes of bake time, and you are ready for some wholesome and delicious snack.

strawberrybanana4

Strawberry Banana Muffins (12 small muffins)

Ingredients:

Wet Ingredients:

  • 1 egg
  • 50g brown sugar
  • 1 over-riped banana, mashed
  • 1 cup strawberries, sliced and slightly coated with all-purpose flour
  • 50ml milk
  • 50ml coconut oil or vegetable oil

Dry Ingredients:

  • 120g all-purpose flour
  • 1/2 teaspoon salt
  • 1/2 teaspoon baking soda

Directions:

  1. Preheat oven to 175C.
  2. Line muffin tin with cupcake liners or lightly grease with cooking spray.
  3. Whisk egg and brown sugar together till sugar is dissolved.
  4. Pour in milk and whisk together.
  5. Add in mashed banana and whisk together.
  6. Pour in coconut oil or vegetable oil and whisk together till everything is combined.  Note: I used coconut oil but any vegetable oil or melted butter will work fine.
  7. Set aside.
  8. Sift all-purpose flour, salt and baking soda into another bowl.  Mix well.
  9. Make a well in the centre of the flour mixture.
  10. Pour wet ingredients into the well and fold mixture together.  Halfway through folding, add in strawberries and continue folding.  Make light and quick folds to avoid getting hard muffins.
  11. Bake in preheated oven for 20 minutes or till muffins turn golden brown and skewer inserted comes out clean.
  12. Cool completely on a wire rack before enjoying them.

strawberrybanana3


Chewy Chocolate Chip Oatmeal Cookies

I love a good chocolate chip cookie and one that is lower in calories makes me happier.  I can eat one or two more without feeling too guilty.  Okay, I try not to eat more than three in a day.  I made a small batch of chocolate chip oatmeal cookies yesterday.  Most recipes call for both brown and white sugar but I used only brown sugar for this one.  I have sensitive teeth and I can’t go for anything that is very sweet.  Plus it is healthier to use less sugar.  Personally, I found the sweetness just right because the semi-sweet chocolate chips added sweetness to each bite. It was a right balance for me.  I also used coconut oil instead of butter so that the cookies will be a tad healthier without compromising taste.

Indeed, these cookies taste really good and they make a great snack for school, work or home.  It was so easy to whip up as well.  It took about twenty minutes to prep, and another twelve minutes to bake.  And I only had to wash one bowl.  Wow!  The weather these days is 34C and staying in the kitchen for too long is not so fun so I really like something easy and simple like this.

chocochipoatmealcookies1

Chewy Chocolate Chip Oatmeal Cookies

Ingredients (about 1 dozen cookies):

  • 1/3 cup coconut oil
  • 1/2 cup packed light brown sugar
  • 1 teaspoon vanilla
  • 3/4 cup all-purpose flour
  • 1/2 cup instant oats
  • 1/2 teaspoon baking powder
  • 1/2 teaspoon salt
  • 1 egg
  • 1/2 cup semi-sweet chocolate chips

Directions:

  1. Preheat oven to 175C.
  2. Line a baking sheet with parchment paper.
  3. Whisk coconut oil and light brown sugar till well incorporated using a hand whisk.
  4. Add egg and then vanilla and mix well.
  5. Sift over all-purpose flour, baking powder and salt over the wet mixture.  Using a spatula, fold everything well, then add oats and chocolate chips.  Fold till well incorporated.
  6. Spoon cookie batter onto baking sheet.  Space them out to allow cookies to spread while baking.
  7. Bake for 12 minutes or till golden brown.
  8. Allow cookies to cool completely and store in an air-tight jar or container.

chocochipoatmealcookies2

chocochipoatmealcookies3

Basic Bread Rolls

One of the food staples in our family is bread.  We have them for breakfast with different spreads almost every morning.  I’ve switched from buying bread to making them myself after I tried homemade bread several years ago.  The taste and texture of homemade bread is so good and the ingredients more wholesome than store bought ones. There isn’t excessive sugar or any form of preservatives in homemade bread and I am convinced this is the healthier option for us.

I’ve tried a few bread recipes and I’m loving this one which yields soft bread rolls each time. Although breads made with tangzhong (water-roux) yields fluffier bread, sometimes I don’t have the time to take this additional step.  Tangzhong, also known as water-roux, is a widely popular method used in making soft fluffy bread that lasts a bit longer than other breads.   To make tangzhong, you will need to use one part bread flour to five parts water, mix the flour and water in a saucepan over low heat till you get a smooth paste. Once the mixtures reaches 65°C (149°F), remove from heat, transfer to a bowl, cover with cling wrap and allow it to cool completely before using.  If you want to check out how to make tangzhong breads, you can check this post.

This recipe is my go-to if I don’t have time for tangzhong.  There isn’t a lot of ingredients and the preparation is straightforward.  The bread is soft and delicious and sometimes I add some fillings into the dough before baking.

milkbuns4

Basic Bread Rolls

Ingredients (makes 8 rolls/buns):

  • 220g bread flour
  • 30g cake flour
  • 2 tablespoons caster sugar
  • 3/4 teaspoon salt
  • 3/4 teaspoon instant yeast
  • 100ml fresh milk
  • 70ml cold water
  • 20g butter
  • a little beaten egg for egg wash

Directions:

  1. Put all ingredients except butter into the bowl of a stand mixer or bread pan of a bread machine.   Knead the dough for 10 minutes.
  2. Add butter and continue kneading until the dough comes together (around 10 minutes).
  3. Transfer the dough into a slightly oiled bowl.  Cover with damp towel or cling wrap and allow it to proof or double in size.  This takes around one hour.
  4. After one hour, check if the dough has proofed properly by deeply depressing the dough with a clean finger.  If the indentation in the dough stays then it is ready for the next step.  Otherwise, let it proof for a while more.
  5. On a slightly floured work surface, knead the dough by hand for about five minutes to expel the gas in the dough, then cut the dough into 8 equal portions.
  6. Put the cut portions of dough on a baking sheet lined with parchment paper.  Cover with damp towel or cling wrap and let it rest for 10 minutes.
  7. After 10 minutes, on a floured work surface and a slightly floured rolling pin, roll the dough into your desired shape.  Add fillings if any and seal the dough.
  8. Set the dough on the baking sheet, cover with damp towel or cling wrap and allow it to proof for another one hour.
  9. Pre-heat oven to 180°C.
  10. Brush egg wash over the dough and bake for 15 minutes.

milkbuns5

These are great with any spreads or they can be eaten plain with your favourite beverage.  I slathered some peanut butter and paired it with coffee.  If you like your bread slightly warm and toasty, just pop it in the oven for a few minutes and it’s as good as freshly baked again.
milkbuns1

I made this twice last week .  The second time, I sprinkled some sesame seeds on the top.  It would be perfect if I had red bean paste to add as a filling.

milkbuns6


Blueberry Oatmeal Muffins

Any breakfast lovers out there?  I am a breakfast person.  I can’t function if I don’t eat in the morning.  In this blog there are more breakfast recipes than lunch or dinner recipes.  I have a sweet tooth and I love baking breads, muffins and cake to have them for breakfast or tea.

Today, I had an urge to make blueberry muffins because I had some blueberries in the freezer.  So I quickly prepped everything and had my muffins ready in 45 minutes.  I added oatmeal to make the muffins healthier and also more filling.

A thing or two about blueberries – They are a super food packed with many nutrients.  They are high in antioxidants and low in calories.  They support digestion and weight loss, promote heart health, as well as boosts brain power.   They are delicious eaten fresh with yogurt, blended into smoothies, or just as they are.   These amazing berries make all kinds of bakes so delicious as well.

blueberrymuffin3

Blueberry Oatmeal Muffins

Ingredients (for 6 muffins):

Dry Ingredients:

  • 60g all-purpose flour
  • 60g instant oats
  • 1/2 teaspoon baking powder
  • 1/4 teaspoon baking soda
  • 1/4 teaspoon salt

Wet Ingredients:

  • 1 egg
  • 40g brown sugar
  • 50ml milk
  • 40ml vegetable oil (I used canola oil)
  • 1 teaspoon vanilla
  • 1 cup blueberrries, lightly tossed in all-purpose flour

Directions:

  1. Pre-heat oven to 180 degree celcius.
  2. Fill muffin tin with cupcake liners.
  3. Sift all-purpose flour, baking powder, baking soda and salt.
  4. Add instant oats to the flour mixture, lightly mix them together and set aside.
  5. Using a hand whisk, whisk egg and brown sugar together until all the sugar is dissolved.
  6. Add milk, vanilla and oil, whisking after each addition of ingredient.
  7. Make a well in the centre of the dry ingredients, then pour the wet ingredients into the well.
  8. Make a few light folds to the wet and dry ingredients then add blueberries and fold a few more times until no traces of flour is seen.
  9. Spoon batter into cupcake liners until about 2/3 full.
  10. Bake in pre-heated oven for 20 minutes.


blueberrymuffin4

These muffins taste really good.  They are moist and not overly sweet.  I will double the recipe the next time so that I can freeze and have them as and when I need to grab a quick breakfast.

blueberrymuffin5Enjoy.

Chocolate Banana Oatmeal Muffins

chocbananaoatmeal2

I’m trying to get into a zero-waste mode.  I hate to throw food away.  There’s always a wave of guilt when I don’t have a choice but to throw the food away either because it is way past the expiration date or when it has wilted and turned bad.  I think of the money wasted and also the countless number of people around the world who are starving and malnourished.  I feel compelled to be more responsible in finishing the food we purchase and to buy only what we really need.  Some of the simple steps I’ve taken to minimise wastage are as follow.

  • Do a stock-take of the fridge and pantry before grocery shopping
  • Jot down the items that need to be replenished
  • Menu plan for the week
  • Jot down the ingredients required to make the meals for the week
  • Stick to the grocery list and do not buy anything that’s not in the list
  • Finish leftovers asap, preferably by the next day to avoid having to throw the food if it goes bad
  • Wash fruit like berries with water and some white vinegar to prolong their shelf life
  • Wrap vegetables with tea towel so that the excess moisture is absorbed by the towel and the vegetables last longer

Let me know if there are other ways in which I can improve on my journey to zero-waste.  Back to the muffins…

After I made Cookie a batch of banana oatmeal dog treats, I used the last over-riped banana to make chocolate banana oatmeal muffins for our breakfast the following morning.  I tweak my muffin recipes quite frequently based on what I have in my pantry.  Sometimes I add almond meal, oatmeal, or wholewheat flour to the dry ingredients mix.  In terms of oils, sometimes it will be coconut oil, vegetable oil or melted butter.  It depends on what I have.  I rarely buy an ingredient to make a one-off bake.  The ingredient will be left to waste so I prefer to use what I have on hand.

Chocolate Banana Oatmeal Muffins (make 6 muffins)

Ingredients:

Dry Ingredients:

  • 70g all-purpose flour
  • 20g unsweetened cocoa
  • 30g instant oats
  • 50g brown sugar
  • 1/2 teaspoon baking powder
  • 1/4 teaspoon baking soda
  • 1/4 teaspoon salt

Wet Ingredients:

  • 1 egg
  • 30ml coconut oil
  • 50ml milk
  • 1 over-riped banana, mashed
  • 1 teaspoon vanilla

Directions:

  1. Preheat oven to 175 degrees celcius.
  2. Line muffin tin with cupcake liners.
  3. Sift all-purpose flour, cocoa, baking powder, baking soda and salt into a large bowl.  Add oats into the mix, stir the mix and set aside.
  4. In a separate bowl, whisk egg and sugar together till light and fluffy.
  5. Add banana and continue whisking.  Then add milk, vanilla and coconut oil, whisking lightly after each addition of ingredient.
  6. Make a well in the centre of the bowl of dry ingredients.
  7. Pour wet ingredients into the well and fold the ingredients together till well incorporated.  Do not over-fold the batter.
  8. Spoon batter into cupcake liners till 2/3 full.
  9. Bake for 20 minutes or till skewer comes out clean.
  10. Allow muffins to cool and enjoy.
  11. Store extras in air-tight container.  You can make extras and store in the freezer for subsequent days breakfast.  Take them out to thaw and pop them in the oven to warm them up.

chocbananaoatmeal1

chocbananaoatmeal3

Homemade Peanut Butter Granola

Do you look forward to breakfast each morning?  I do, because I get peckish around one hour after waking up.  I can’t do without breakfast.  My concentration dips when I haven’t eaten.  I need to kick-start my engine with some breakfast food and a cup of coffee.  I start my mornings with a glass of water.   An hour later, I will have my breakfast, usually a sandwich or muffin with coffee.  I have a coffee addiction so coffee with milk is a must.  Once that’s done, I have the energy to work my way through the morning.

I love making bread and muffins for breakfast.  But recently, I was hoping to make some granola to go with yogurt and fruit for breakfast.  I’m trying to incorporate more whole grains into our diet and I think adding oats into our breakfast is a great way to healthier eating.

Oats are a good source of carbohydrates, fibre, important vitamins, minerals and anti-oxidants.  They are gluten-free whole grains and they contain more protein and fat than most other grains.  Some of the benefits of eating oats include lowering blood sugar and cholesterol levels, protection against skin irritation and reduced constipation.  Since oats is very filling, it is also a weight-loss friendly food.

In this easy homemade granola recipe, I added peanut butter to the mix because we love peanut butter.  I also added some chopped almonds.  This is optional.  I had some leftover almonds and I thought it would give a nice crunchy texture and added nutty flavour.

granola5

Homemade Peanut Butter Granola

Ingredients:

  • 2 cups old fashioned oats
  • 1/2 teaspoon ground cinnamon
  • 1/4 teaspoon salt
  • 1/4 cup chopped almonds
  • 1/4 cup natural peanut butter
  • 1/4 cup honey
  • 1/2 teaspoon vanilla

Directions:

  1. Preheat oven to 160 degrees celcius.
  2. Line a large cookie sheet with parchment paper.  Set aside.
  3. In a large bowl, mix together oats, almonds, cinnamon and salt.  Set aside.
  4. In a microwave-safe dish or over the stove top, melt peanut butter and honey together till you get a smooth consistency.
  5. Remove from heat and stir in vanilla.
  6. Add peanut butter and honey mixture into dry ingredients and stir till well combined.
  7. Spread mixture on lined cookie sheet.
  8. Bake in preheated oven for 20 minutes or until granola is lightly browned.  Halfway through baking, stir the granola to get even cooking and browning.
  9. Remove from oven and allow it to cool completely.
  10. Store in air-tight jar.

granola6

I was happy with the result of the granola.  It was crunchy, lightly sweet and nutty.  I had a hearty breakfast of yogurt and blueberries topped with granola.  It was delicious and filling.  The best thing was that it was nutritious.  I stored the granola in a glass jar and I think it will be gone in no time since there are so many ways to eat granola.   It can be eaten on its own or with milk.  It can also be a topping for fudge, added to a peanut butter sandwich or parfait, or even used in baking cookies, bars or cake etc.  The good thing is that it is so easy to put together a fresh batch anytime because the ingredients and steps are very simple.   I hope you enjoy this granola as much as I did 


Chocolate Muffins

chocmuffin1

I had some cocoa that was expiring soon.  I needed to make something for an afternoon snack.  And I realised I didn’t have much time left before my daughter came home.  So I decided quickly to make chocolate muffins that would be ready within one hour.  Muffins are easy to make because you just have to mix dry and wet ingredients together.  They are good for breakfast and a snack to go.  I am not a fan of muffins.  I’d rather go for a chiffon cake.  But after I tried these chocolate muffins, I was sure I would make them again.  When they were baking, the house was filled with the aroma of chocolate.  My senses brought me to those times when I walk by the Famous Amos cookie store.  When I finally had time to try one, I was happy that the taste didn’t disappoint.  It tasted so wonderful, thanks to the cocoa and the coconut oil.

I decided at the last minute to use coconut oil for these muffins.  Baking with coconut oil is great.  The bakes always turn out so aromatic and fragrant.  Coconut oil is also a healthier option than melted butter and vegetable oil.  Coconut oil is high in natural saturated fats. Saturated fats not only increase the healthy cholesterol (known as HDL cholesterol) in your body, but also help convert the LDL “bad” cholesterol into good cholesterols.  By increasing the HDL in the body, it helps promote heart health and lower the risk of heart disease.

The amount of coconut oil used in this recipe doesn’t leave the muffins with a strong coconut taste.  In fact, it is so subtle you can’t really taste it and it blends so well with the cocoa.  I love taking a whiff out of the coconut oil jar.  It’s such a natural fragrance!  This recipe works well with vegetable oil if you don’t have coconut oil.  You can use any light tasting vegetable oil.   The result will be great as well.  You can top this with semi-sweet chocolate chips if you want to up the level of chocolate.  This recipe is really great if you are in a hurry.  I had these done in 45 minutes.  So busy moms, this is for you.

Ingredients (for 6 muffins)

Dry ingredients:

  • 100g all-purpose flour
  • 20g unsweetened cocoa
  • 1/2 teaspoon baking powder
  • 1/4 teaspoon baking soda
  • pinch of salt

Wet ingredients:

  • 1 egg, room temperature
  • 50g brown sugar
  • 50ml milk
  • 40ml coconut oil/vegetable oil
  • 1 teaspoon vanilla

Directions:

  1. Pre-heat oven to 175 degrees celcius.
  2. Fill muffin tin with cupcake liners.
  3. Sift dry ingredients (all-purpose flour, cocoa, baking powder, baking soda and salt) into a bowl.  Set aside.
  4. In a separate bowl, whisk egg and brown sugar together till light and fluffy.
  5. Add milk and continue whisking.  Next, add in vanilla and coconut oil and whisk them together till well incorporated.
  6. Make a well in the centre of the dry ingredients with a spatula.
  7. Pour in wet ingredients into the well.  Fold wet ingredients and dry ingredients till well incorporated with no traces of flour.  Make light and quick folds and do not over-fold as this will result in tough muffins.
  8. Spoon batter into cupcake liners till 2/3 full.
  9. Bake in pre-heated oven for 20 minutes.
  10. Allow the muffins to cool and then enjoy!

chocmuffin2

chocmuffin3

Mixed Berries Yogurt Muffins

yogurtmuffins1

I always think muffins when I need to whip up something fuss-free for breakfast.  Everything can be done in one hour, from preparation to getting the muffins out of the oven.  I also like that the ingredients are few and there are only two bowls to wash at the end of the preparation.  Great for busy or lazy days.

For today’s muffins, I used the mixed berries yogurt that has been in my fridge for two weeks now.  I was not into chocolate this time because I preferred something fresh and perky for the morning.  Too bad I didn’t have fresh blueberries or strawberries to add because ideally it would be more wholesome with real fruit.  I went ahead to whip up the muffins without the fresh berries.  One hour later with all my bowls and utensils washed, the muffins were ready!

I did a taste test after they were cooled ten minutes.  They were very fluffy and moist, and they had the right amount of sweetness and tartness.  Looks wise, they didn’t appear too pretty.  Well, muffins never looked pretty anyway.  But they are healthy and delicious.  These are good to pack for work and school.  You can make bigger batches to freeze so you have something for breakfast or tea when you don’t have time to make any.  Simply thaw and warm up in the oven.

Mixed Berries Yogurt Muffins

Ingredients (for 6 muffins):

120g all-purpose flour

1 teaspoon baking powder

1/2 teaspoon baking soda

1/4 teaspoon salt

1 egg, at room temperature

40g caster sugar

140g mixed berries yogurt

30g vegetable oil (I used canola oil)

1 teaspoon vanilla

2 teaspoons lemon juice

1 teaspoon lemond rind

Directions: 

  1. Preheat oven to 175 degrees celcius.
  2. Line muffin tin with cupcake liners.
  3. Prepare dry ingredients – Sift all-purpose flour, baking powder, baking soda and salt into a mixing bowl.  Set aside.
  4. Prepare wet ingredients – In a separate mixing bowl, using a hand whisk, whisk egg and sugar together till light and fluffy.
  5. Add yogurt and continue whisking.  Add in vanilla, lemon juice and vegetable oil and mix well after each addition.
  6. Lastly, add lemon rind and incorporate well.
  7. Using a spatula, make a well in the centre of the flour mixture.  Pour in wet ingredients and fold the wet ingredients and dry ingredients.  Fold till both are incorporated well and there are no traces of flour.  Do not over-fold as this will result in tough muffins.  If you are adding fresh berries, coat them with a little flour and fold them in at this stage.
  8. Spoon batter into cupcake liners.  Sprinkle tops with lemon rind (optional).
  9. Bake in preheated oven for 20 minutes or tops are golden brown.  Test for doneness by inserting a skewer in the centre of the muffin.  When done, the skewer should come out clean.

yogurtmuffins4

Have a happy breakfast!

Soft Wholemeal Loaf Bread


wholemeal loaf4

I love my bread machine.  Guess some of you know that already.  I blogged about making bread some time ago.  You can read the post here Loving the bread machine.  That said, there is one thing I don’t like about my bread machine.  There is a problem every time I bake loaf breads in the machine.  You see, it has to do with the blade in the bread pan.  When the loaf is baked in the bread machine, there will be an unsightly hole at the base of the loaf.  When I slice the loaf there will be at least two slices with a hole.  One way to get around this is to remove the blade after kneading is completed and continue to let the bread bake in the bread machine and another is to remove the dough, proof and bake it in the oven.  I chose the latter as I wanted to try shaping it and baking in a loaf tin.

I made a loaf of soft wholemeal bread yesterday.  I loved the outcome of the loaf.  It was soft, fluffy and delicious.  It was easy to make and didn’t require many ingredients or steps.  I had planned to make white bread but at the last minute decided to add a bit of wholemeal flour.  My daughter is not a fan of wholemeal bread so I had to sneak a little in to get her to start liking it bit by bit.  Well, she ate it without even asking me why it’s not white.  I made some egg mayo and she enjoyed a good old egg sandwich as an after school snack.

Though I made this loaf with the help of my bread machine, you can also make it by hand or with an electric mixer with a dough hook.  If you are making by hand, you just need to combine everything and form a dough, knead it for ten minutes, then knead the butter into the dough and continue until the dough doesn’t stick to your hands.  I had a very aching arm when I tried making bread dough by hand because it does take quite of lot of time and strength for the dough to reach the stage whereby it is elastic and not sticky.  It’s better to use an electric mixer, attach a dough hook and let the mixer do the hard work for you.  Add everything into the bowl of the mixer, except for butter which is to be added ten minutes later when everything has been incorporated.

Soft Wholemeal Loaf Bread

Ingredients:

195g bread flour

55g wholemeal flour

2 tablespoons caster sugar

1 tablespoon milk powder

1 teaspoon salt

1 teaspoon instant yeast

20g unsalted butter

170ml cold water

Directions:

  1. Add ingredients following your bread machine’s instructions and set to dough function.
  2. Remove dough from bread machine when kneading is completed.  Place dough in a slightly oiled bowl and cover with cling wrap.  Let it proof for one hour.
  3. Prepare a loaf tin by lining it with parchment paper or lightly greasing the tin.
  4. After one hour, test if the dough has proofed properly by depressing the dough with a finger.  It should form a deep indentation on the dough and the depression should stay.  There shouldn’t be any dough sticking to the finger you used.
  5. Transfer dough to a lightly floured work surface and knead the dough by hand for about five minutes.  This is to expel the trapped gas in the dough.
  6. Next, divide the dough into three equal portions.
  7. Lightly dust your hands and rolling pin with flour.  Flatten each portion of dough with the rolling pin into an oval shape.  Roll the dough from the base of the oval all the way up.  Place the dough into the loaf tin.  Repeat till all three portions are done.
  8. Cover the loaf tin with cling wrap and let it rest for 10 minutes.
  9. After ten minutes, repeat process in Step 7.  Place the rolled up dough into the loaf tin and let it proof a second time.  Cover the dough with cling wrap.  The second proofing will take one hour.
  10. After one hour is up, you will notice that the dough has doubled in size.
  11. Pre-heat the oven to 180 degrees celcius.
  12. Brush a little milk on the top of the dough and bake in pre-heated oven for about 15 minutes.
  13. Remove the loaf tin from the oven and let it cool for 10 minutes before removing the loaf and transferring to a wire rack to cool completely.
  14. Slice with a sharp knife and enjoy the homemade freshness!

wholemeal loaf6


Bak Kwa Buns

bakkwa1

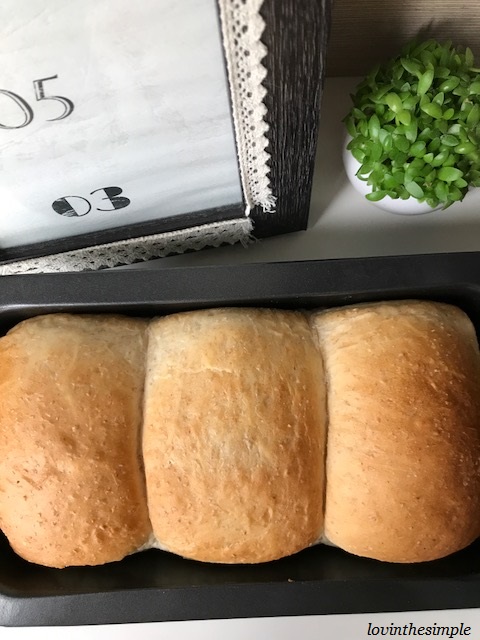
Bak Kwa buns are really delicious.  There aren’t many bakeries that sell this kind of bun.  However it is very common to find its counterpart, pork floss bun sold in almost every bakery here in Singapore.  Bak Kwa, also known as rougan in Mandarin is Chinese salty-sweet dried meat similar to jerky.  Often times the meat is grilled over charcoal to give it a smoky flavour, then blended with a combination of spices, soy sauce and sugar. It can be used as an ingredient in other dishes or enjoyed on its own.

bakkwapic

In the old times, Bak Kwa was an expensive, luxury food and families only splurged on it during Chinese New Year when they wanted to welcome prosperity for the coming New Year and offer lavish gifts for friends and family.

While it is no longer as expensive as it once was, it is still a traditional Chinese New Year food and welcomed gift for friends or relatives.

Bak Kwa is available throughout the year nowadays and people can enjoy it anytime, not just during Chinese New Year.  I received a packet of Bak Kwa as a gift recently and I decided to use Bak Kwa as a filling for my bread buns today.

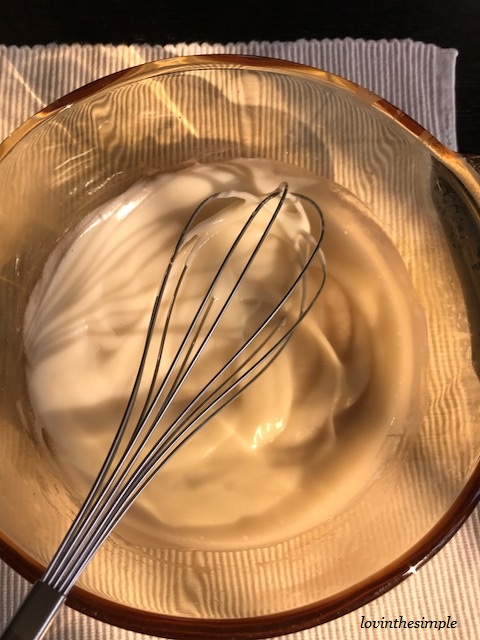
I used the water roux  or tangzhong method in making the bread buns.  Water roux makes bread extra soft, tender and fluffy.  Water roux locks in the liquid throughout the entire process of mixing and baking.  This results in breads that stay soft and fresh for longer.  Water roux is basically a mixture of water and bread flour.  To make it, you have to mix 1 part bread flour to 5 parts water (1:5 ratio)  over 65 deg celcius.  At 65°C, the gluten in the bread flour and water mixture would absorb the moisture and become leavened. Thus, when the water roux or tangzhong is added into other ingredients of a bread dough, it will be heightened and produce fluffier bread.  The detailed description on how to make water roux is included in the recipe below.  Here is the water roux I made.

tangzhong1

tangzhong2

Bak Kwa Buns 

Ingredients (makes 12 buns):

For water roux:

20g bread flour

100ml water

For bread buns:

195g bread flour

90g cake flour

12g milk powder

30g caster sugar

6g salt

6g instant yeast

1 egg, lightly beaten

65g water

75g water roux

45g unsalted butter

a small portion of beaten egg for egg wash

For filling:

2 slices Bak Kwa, cut into small pieces or diced

Directions:

  1. To make water roux, place 20g bread flour in a saucepan.  Add 100ml water, mix with a hand whisk till smooth, making sure there are no lumps of flour.  Cook over medium to low heat, stirring constantly with the hand whisk to prevent it from burning.  Within 1 to 2 minutes, the mixture will start to thicken, stop when you see traces in the mixture for every stir you make with the hand whisk.  Immediately transfer the water roux into a bowl and cover it with a cling wrap, making sure the cling wrap sticks onto the surface of the mixture.  This is to prevent a film from forming on the surface.  Leave to cool completely before using it.
  2. To make the bread dough, place bread flour, cake flour, milk powder, sugar, salt, yeast, egg, water and water roux (use 75g) in the mixing bowl of a stand mixer. Let the mixer knead the dough on high speed until the ingredients come together to form a dough, this takes about 8 to 10 minutes.  Add the butter and continue to knead for another 15 to 20 minutes until the dough becomes smooth and elastic.  Upon adding the butter, the dough will become wet again, add some flour if it remains wet after 10 minutes of kneading. (You can make the dough with a bread machine, follow the instructions of your bread machine for the steps in adding ingredients)
  3. Place dough in a lightly greased bowl, cover with cling wrap and let it proof for about one hour or till it doubles in size.
  4. Remove the dough from the bowl to a lightly floured work surface and knead the dough to expel the gas in the dough.  Divide the dough into 12 equal portions each weighing 45g.  Roll each dough into smooth rounds, cover with cling wrap and let them rest for 10 minutes.
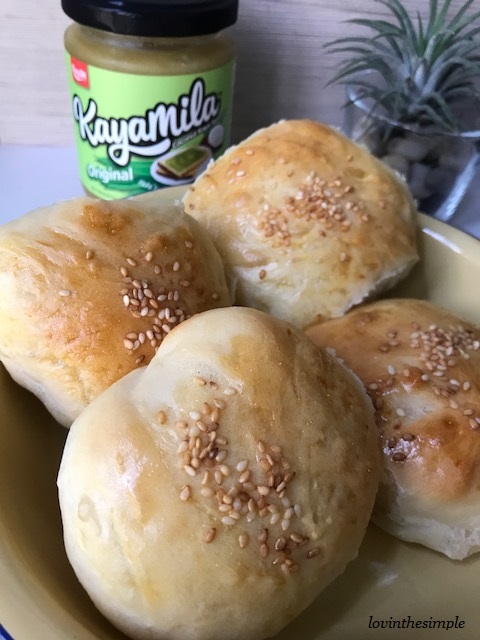
  5. On a lightly floured surface, flatten each dough into a round disc.  Press out any trapped air as you flatten the dough.   Wrap each dough with diced Bak Kwa.  Pinch and seal the seam tightly.
  6. Place seam side down on a baking tray lined with parchment paper.  Cover with cling wrap and proof for a second time for about one hour or till they double in size.
  7. Brush the top of each bun with egg wash.
  8. Bake in pre-heated oven at 180 deg celcius for 12 – 15 minutes.  Remove from oven and transfer to wire rack to cool.  Once cooled completely, store the buns in a airtight container.

bakkwa2

bakkwa3

bakkwa4

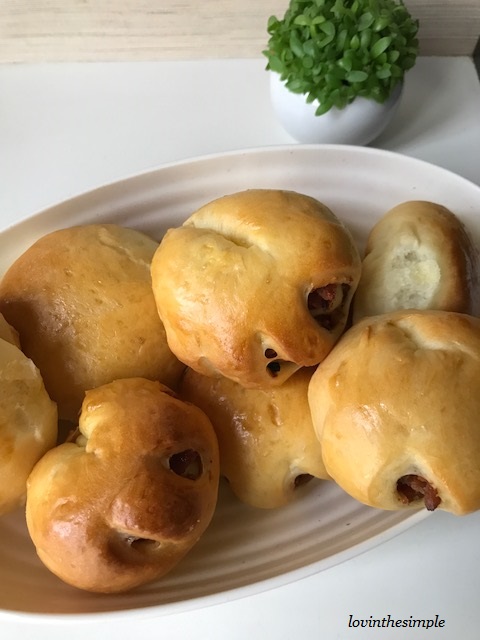
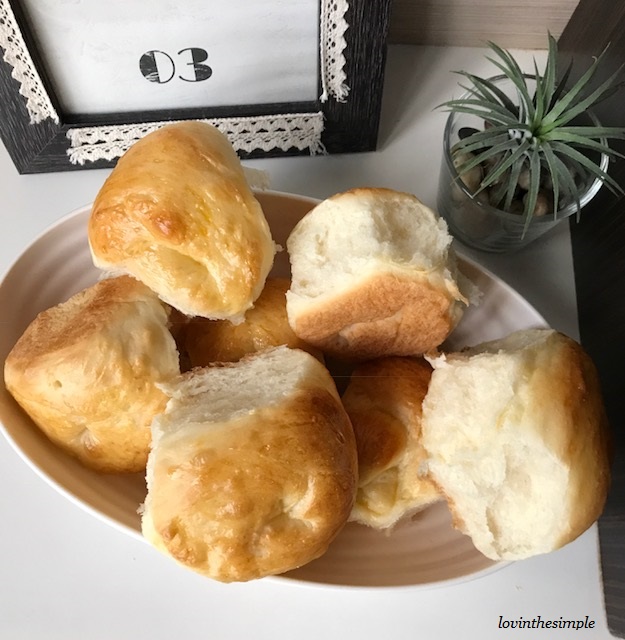
These are so good.  My daughter ate four in a day 🙂

Enjoy!

bread bun recipe credit: happyhomebaking.blogspot.com