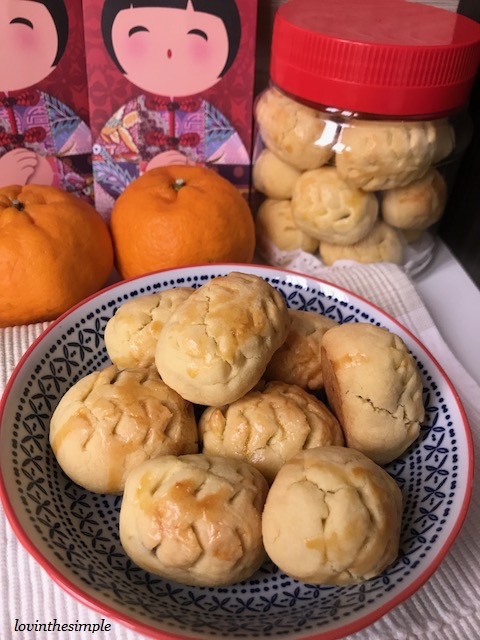
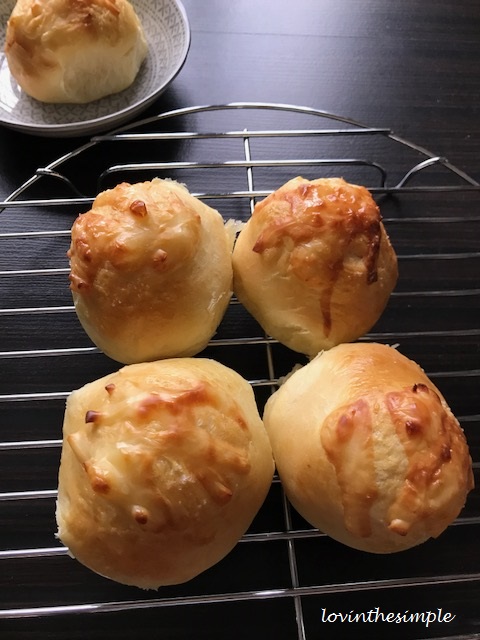
Marble Cake

It has been a tough week.  I feel a little under the weather and bothered by a problem.  It has been a few days since I started feeling unmotivated.  Today, I said to myself is time to get past moody feelings and start getting things done.  I haven’t been baking much.  Since baking is therapeutic for me, I decided to make something and start feeling productive again.

I didn’t take long to decide to make a marble cake because the whole family loves it.  But I didn’t have butter.   I did have a new jar of coconut oil so I went ahead to make marble cake with coconut oil.  I second guessed the cake would turn out well since my muffins made with coconut oil always turn out alright.  I prepped everything and sent the loaf cake to bake in the oven.  As I went around doing my chores, the aroma from the kitchen wafted and make me sense that I would have a nice dessert that afternoon.

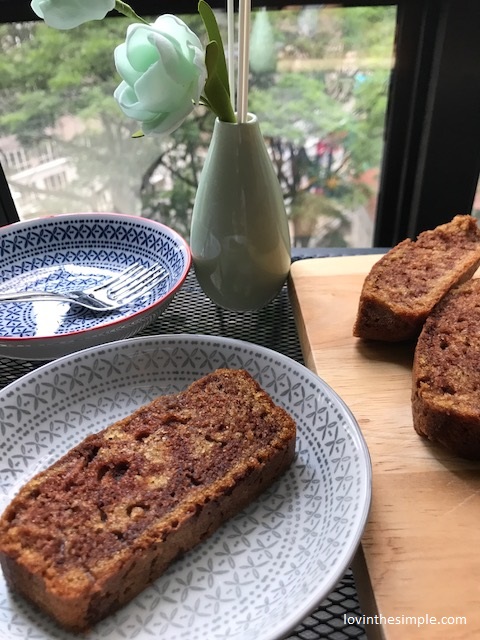
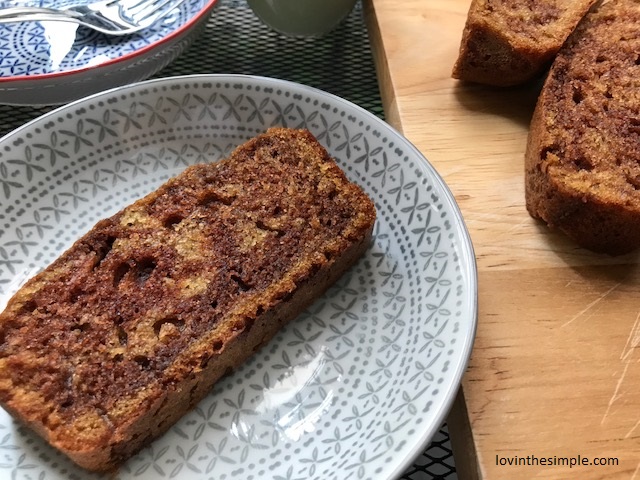
When the cake finished baking in about 35 minutes, I let it cool completely before cutting it.  I was so happy the cake turned out very moist and delicious.  The only disappointment was the marbling of the cake.  It wasn’t prominent at all.  I used brown sugar in the main batter which made the cake turn out darker.  I should have used white sugar.  But since the cake tasted great, I thought I would share the recipe.
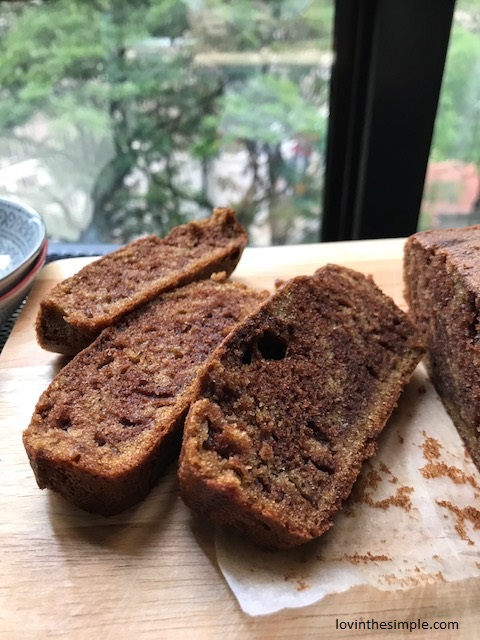
marble1

marble3

Coconut Oil Marble Cake

Ingredients (one loaf cake):

  • 100g all-purpose flour
  • 100g granulated sugar
  • 100ml coconut oil
  • 100ml milk
  • 2 eggs
  • 1 teaspoon baking powder
  • 1/2 teaspoon baking soda
  • 1/4 teaspoon salt
  • 2 teaspoons unsweetened cocoa
  • 1 teaspoon vanilla

Directions:

  1. Pre-heat oven to 175°C.
  2. Line loaf tin with parchment paper or lightly grease the tin.
  3. Sift all-purpose flour, baking powder, baking soda and salt and set aside.
  4. Using a hand whisk, beat sugar and coconut oil till all the sugar is dissolved.
  5. Add eggs and whisk to combine.
  6. Add vanilla and milk and whisk to combine.
  7. Add flour mixture and fold till everything is well combined and there are no traces of flour.
  8. Pour half of the batter into another clean and dry mixing bowl.  Set aside the other half.  You would have two bowls of batter.
  9. Sift cocoa powder over one of the bowls and fold to incorporate everything.  Make sure there are no traces or lumps of cocoa.
  10. Pour the batter into the loaf tin by alternating between the two bowls of batter.  Repeat till all batter is used.
  11. Use a knife or skewer to make swirls through the batter for a marble effect.
  12. Bake in preheated oven for around 35 – 40 minutes.  Check doneness by using a skewer to insert into the centre of the cake.  If the skewer comes out clean the cake is done.
  13. Transfer the cake to a cooling rack and slice when fully cooled.
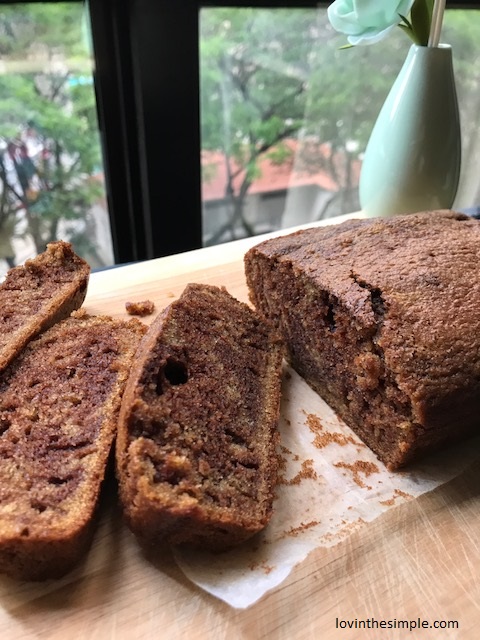
marble2


marble4

Lemon Chiffon Cake

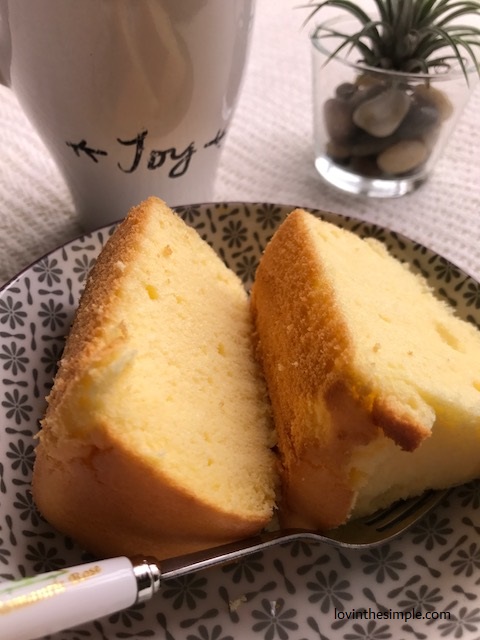
A light and airy cake is on the menu today.  It’s a cool day with overcast skies.  A respite from the tropical heat experienced over the last few days.  I really welcome the slight drizzle and the cool breeze with big open arms.  Walking my dog today has been so pleasant.

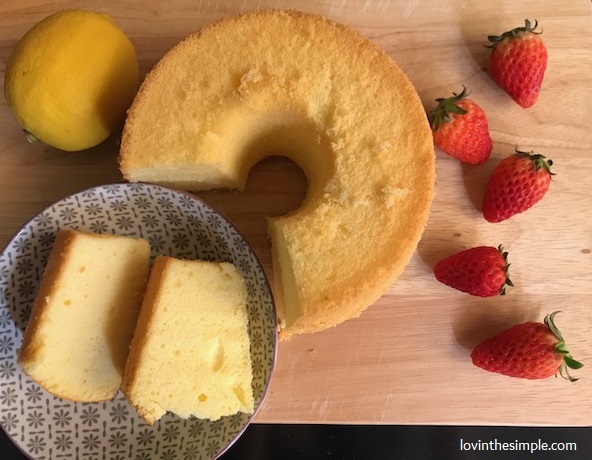
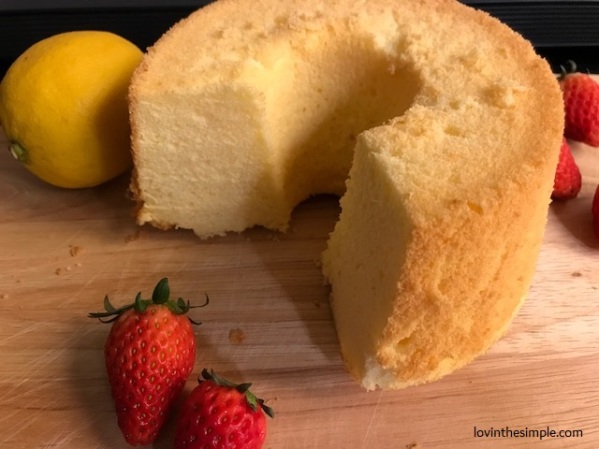
The weather has put me in a good mood to bake a lemon chiffon cake.  I hadn’t had a chiffon cake for many months.  The cake turned out pleasantly, light and airy with a tinge of fresh lemon scent.  I love it.  The recipe is pretty simple and uncomplicated.  I used the juice of half a lemon and some lemon rind to flavour the cake.  The other ingredients are the standard egg yolks, egg whites, vegetable oil, caster sugar and cake flour.  For the meringue, I beat my egg whites till they are at soft peak stage.  The cake rose beautifully and shrank just a little while cooling (this is normal).  The cake tasted light and refreshing and is a perfect pairing with tea or coffee.  I’m thankful for this simple enjoyment I have today.

lemonchiffon1

lemonchiffon2

Lemon Chiffon Cake

Ingredients (for a 17cm chiffon cake pan):

  • 3 egg yolks
  • 15g caster sugar
  • 20ml fresh milk
  • 40ml vegetable oil (I used canola oil)
  • 15ml lemon juice (about juice of 1/2 lemon)
  • 1/2 teaspoon lemon rind
  • 70g cake flour
  • 1/2 teaspoon baking powder
  • 3 egg whites
  • 45g caster sugar

Direction:

  1. Preheat oven to 170C.
  2. Using a hand whisk, mix egg yolks and 15g sugar until all the sugar is dissolved.
  3. Add milk and continue to whisk.  Then add lemon juice and lemon rind, whisk to combine.
  4. Add vegetable oil and whisk to combine everything.
  5. Add cake flour and baking powder and use a spatula to fold the flour into the wet mixture.  Set aside.
  6. Using an electric mixer, beat egg whites until they become frothy.  Add 45g sugar in 3 parts, beating until you get soft peaks.
  7. Take 1/3 of the meringue and fold into the egg yolk mixture.  Make sure that the meringue is completely folded in.  Repeat with another 1/3 until all the meringue is folded completely into the egg yolk mixture.
  8. Pour batter into chiffon cake pan.  The cake pan doesn’t need any parchment paper or greasing.
  9. Tap the cake pan on the counter a few times to release any air bubbles trapped in the batter.
  10. Bake in preheated oven for 30 minutes.
  11. When the cake is done, remove from the oven carefully and immediately invert the cake pan on the base of a cup or bowl.  This step is important so that the cake doesn’t collapse.
  12. Let the cake cool completely.  This takes about 1 hour.
  13. When the cake has cooled, turn the cake pan over and use a thin bladed knife to run through the rim to release the cake.
  14. Slice cake and store in an air-tight container.


lemonchiffon3

Chewy Chocolate Chip Oatmeal Cookies

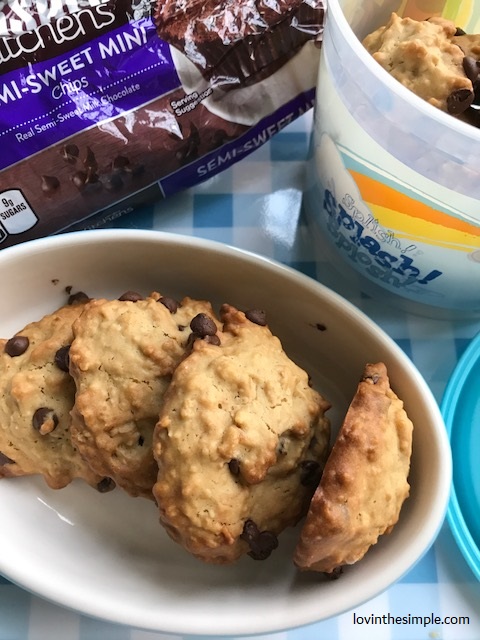
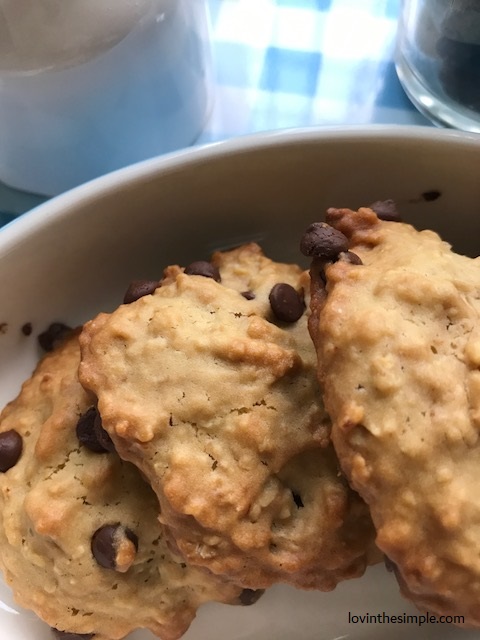
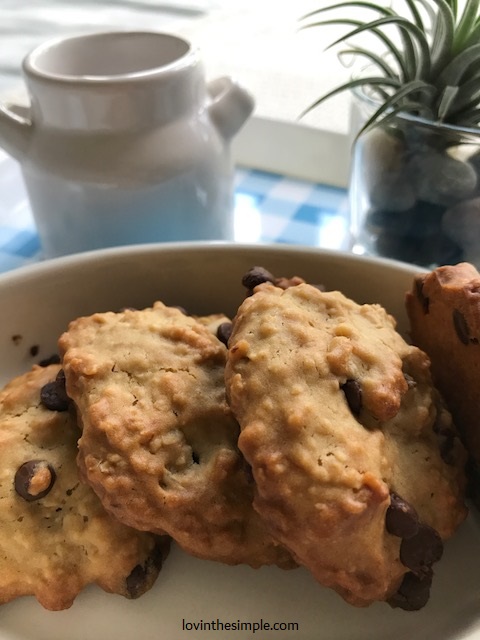
I love a good chocolate chip cookie and one that is lower in calories makes me happier.  I can eat one or two more without feeling too guilty.  Okay, I try not to eat more than three in a day.  I made a small batch of chocolate chip oatmeal cookies yesterday.  Most recipes call for both brown and white sugar but I used only brown sugar for this one.  I have sensitive teeth and I can’t go for anything that is very sweet.  Plus it is healthier to use less sugar.  Personally, I found the sweetness just right because the semi-sweet chocolate chips added sweetness to each bite. It was a right balance for me.  I also used coconut oil instead of butter so that the cookies will be a tad healthier without compromising taste.

Indeed, these cookies taste really good and they make a great snack for school, work or home.  It was so easy to whip up as well.  It took about twenty minutes to prep, and another twelve minutes to bake.  And I only had to wash one bowl.  Wow!  The weather these days is 34C and staying in the kitchen for too long is not so fun so I really like something easy and simple like this.

chocochipoatmealcookies1

Chewy Chocolate Chip Oatmeal Cookies

Ingredients (about 1 dozen cookies):

  • 1/3 cup coconut oil
  • 1/2 cup packed light brown sugar
  • 1 teaspoon vanilla
  • 3/4 cup all-purpose flour
  • 1/2 cup instant oats
  • 1/2 teaspoon baking powder
  • 1/2 teaspoon salt
  • 1 egg
  • 1/2 cup semi-sweet chocolate chips

Directions:

  1. Preheat oven to 175C.
  2. Line a baking sheet with parchment paper.
  3. Whisk coconut oil and light brown sugar till well incorporated using a hand whisk.
  4. Add egg and then vanilla and mix well.
  5. Sift over all-purpose flour, baking powder and salt over the wet mixture.  Using a spatula, fold everything well, then add oats and chocolate chips.  Fold till well incorporated.
  6. Spoon cookie batter onto baking sheet.  Space them out to allow cookies to spread while baking.
  7. Bake for 12 minutes or till golden brown.
  8. Allow cookies to cool completely and store in an air-tight jar or container.

chocochipoatmealcookies2

chocochipoatmealcookies3

Basic Bread Rolls

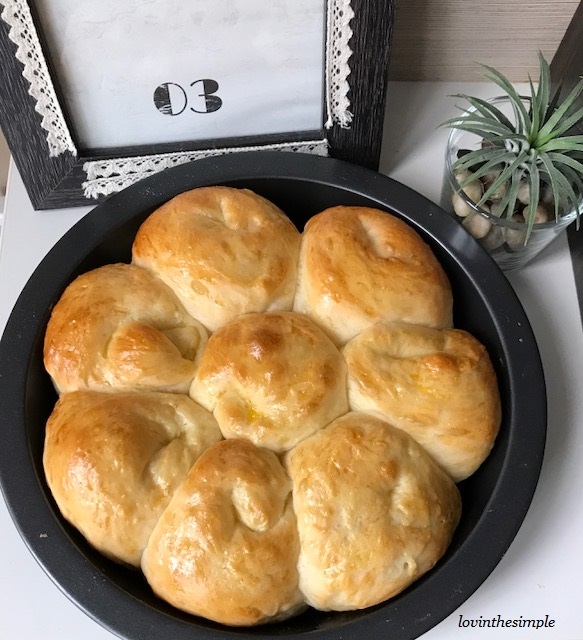
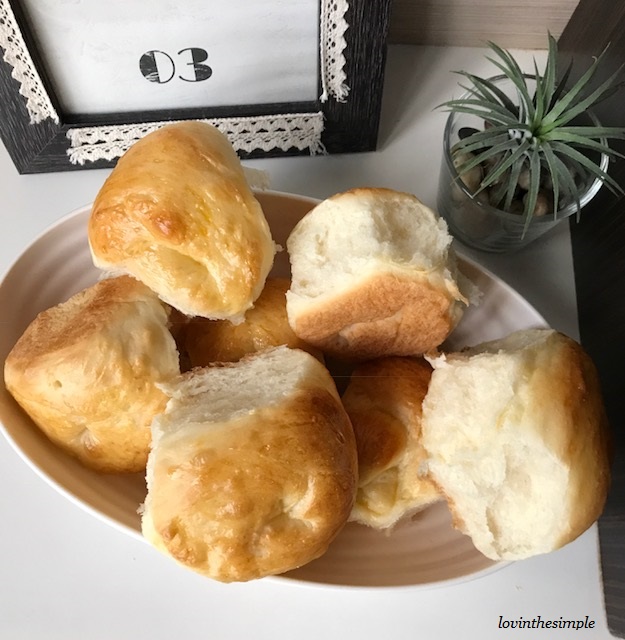
One of the food staples in our family is bread.  We have them for breakfast with different spreads almost every morning.  I’ve switched from buying bread to making them myself after I tried homemade bread several years ago.  The taste and texture of homemade bread is so good and the ingredients more wholesome than store bought ones. There isn’t excessive sugar or any form of preservatives in homemade bread and I am convinced this is the healthier option for us.

I’ve tried a few bread recipes and I’m loving this one which yields soft bread rolls each time. Although breads made with tangzhong (water-roux) yields fluffier bread, sometimes I don’t have the time to take this additional step.  Tangzhong, also known as water-roux, is a widely popular method used in making soft fluffy bread that lasts a bit longer than other breads.   To make tangzhong, you will need to use one part bread flour to five parts water, mix the flour and water in a saucepan over low heat till you get a smooth paste. Once the mixtures reaches 65°C (149°F), remove from heat, transfer to a bowl, cover with cling wrap and allow it to cool completely before using.  If you want to check out how to make tangzhong breads, you can check this post.

This recipe is my go-to if I don’t have time for tangzhong.  There isn’t a lot of ingredients and the preparation is straightforward.  The bread is soft and delicious and sometimes I add some fillings into the dough before baking.

milkbuns4

Basic Bread Rolls

Ingredients (makes 8 rolls/buns):

  • 220g bread flour
  • 30g cake flour
  • 2 tablespoons caster sugar
  • 3/4 teaspoon salt
  • 3/4 teaspoon instant yeast
  • 100ml fresh milk
  • 70ml cold water
  • 20g butter
  • a little beaten egg for egg wash

Directions:

  1. Put all ingredients except butter into the bowl of a stand mixer or bread pan of a bread machine.   Knead the dough for 10 minutes.
  2. Add butter and continue kneading until the dough comes together (around 10 minutes).
  3. Transfer the dough into a slightly oiled bowl.  Cover with damp towel or cling wrap and allow it to proof or double in size.  This takes around one hour.
  4. After one hour, check if the dough has proofed properly by deeply depressing the dough with a clean finger.  If the indentation in the dough stays then it is ready for the next step.  Otherwise, let it proof for a while more.
  5. On a slightly floured work surface, knead the dough by hand for about five minutes to expel the gas in the dough, then cut the dough into 8 equal portions.
  6. Put the cut portions of dough on a baking sheet lined with parchment paper.  Cover with damp towel or cling wrap and let it rest for 10 minutes.
  7. After 10 minutes, on a floured work surface and a slightly floured rolling pin, roll the dough into your desired shape.  Add fillings if any and seal the dough.
  8. Set the dough on the baking sheet, cover with damp towel or cling wrap and allow it to proof for another one hour.
  9. Pre-heat oven to 180°C.
  10. Brush egg wash over the dough and bake for 15 minutes.

milkbuns5

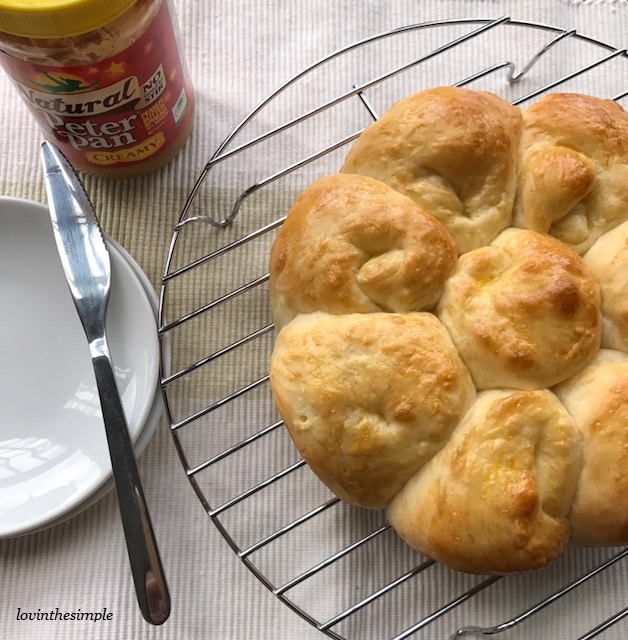
These are great with any spreads or they can be eaten plain with your favourite beverage.  I slathered some peanut butter and paired it with coffee.  If you like your bread slightly warm and toasty, just pop it in the oven for a few minutes and it’s as good as freshly baked again.
milkbuns1

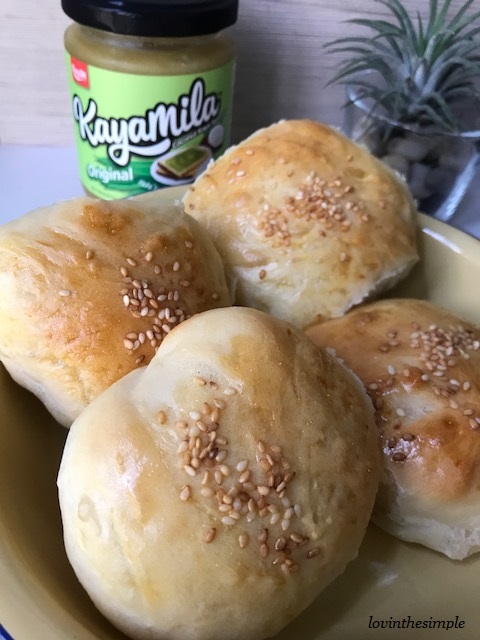
I made this twice last week .  The second time, I sprinkled some sesame seeds on the top.  It would be perfect if I had red bean paste to add as a filling.

milkbuns6


Blueberry Oatmeal Muffins

Any breakfast lovers out there?  I am a breakfast person.  I can’t function if I don’t eat in the morning.  In this blog there are more breakfast recipes than lunch or dinner recipes.  I have a sweet tooth and I love baking breads, muffins and cake to have them for breakfast or tea.

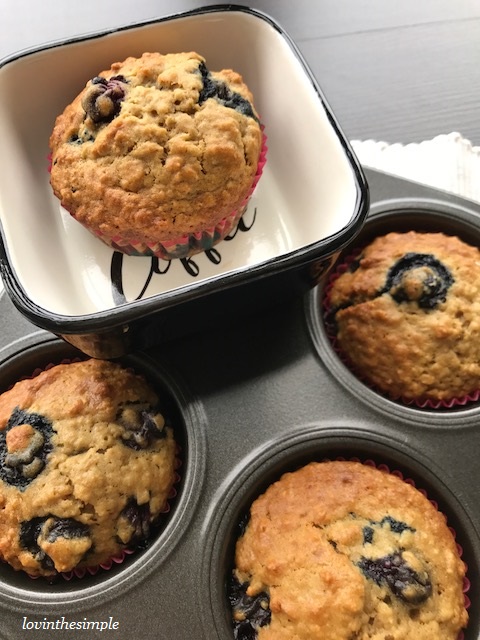
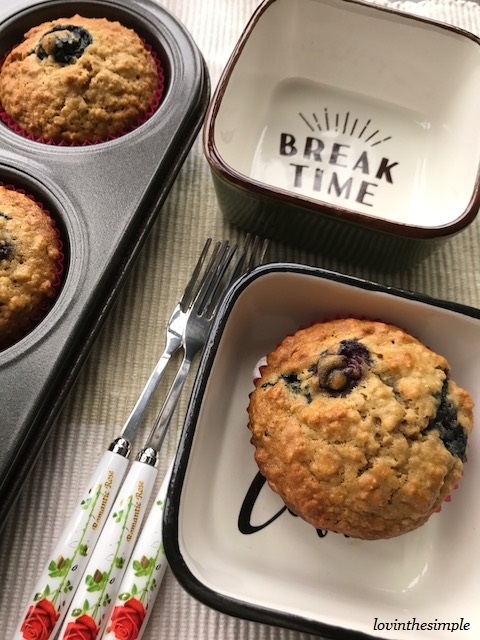
Today, I had an urge to make blueberry muffins because I had some blueberries in the freezer.  So I quickly prepped everything and had my muffins ready in 45 minutes.  I added oatmeal to make the muffins healthier and also more filling.

A thing or two about blueberries – They are a super food packed with many nutrients.  They are high in antioxidants and low in calories.  They support digestion and weight loss, promote heart health, as well as boosts brain power.   They are delicious eaten fresh with yogurt, blended into smoothies, or just as they are.   These amazing berries make all kinds of bakes so delicious as well.

blueberrymuffin3

Blueberry Oatmeal Muffins

Ingredients (for 6 muffins):

Dry Ingredients:

  • 60g all-purpose flour
  • 60g instant oats
  • 1/2 teaspoon baking powder
  • 1/4 teaspoon baking soda
  • 1/4 teaspoon salt

Wet Ingredients:

  • 1 egg
  • 40g brown sugar
  • 50ml milk
  • 40ml vegetable oil (I used canola oil)
  • 1 teaspoon vanilla
  • 1 cup blueberrries, lightly tossed in all-purpose flour

Directions:

  1. Pre-heat oven to 180 degree celcius.
  2. Fill muffin tin with cupcake liners.
  3. Sift all-purpose flour, baking powder, baking soda and salt.
  4. Add instant oats to the flour mixture, lightly mix them together and set aside.
  5. Using a hand whisk, whisk egg and brown sugar together until all the sugar is dissolved.
  6. Add milk, vanilla and oil, whisking after each addition of ingredient.
  7. Make a well in the centre of the dry ingredients, then pour the wet ingredients into the well.
  8. Make a few light folds to the wet and dry ingredients then add blueberries and fold a few more times until no traces of flour is seen.
  9. Spoon batter into cupcake liners until about 2/3 full.
  10. Bake in pre-heated oven for 20 minutes.


blueberrymuffin4

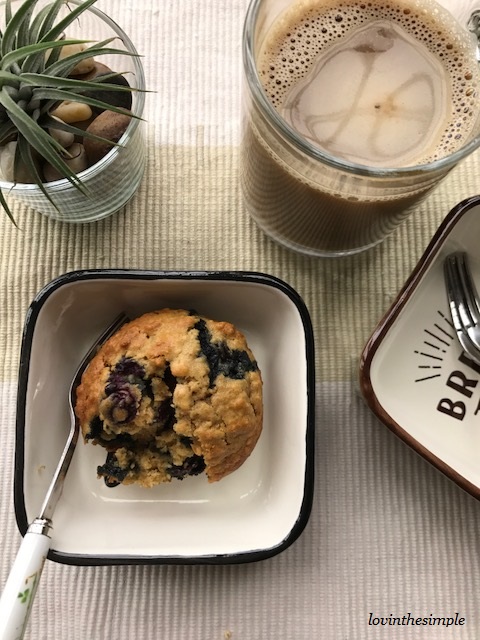
These muffins taste really good.  They are moist and not overly sweet.  I will double the recipe the next time so that I can freeze and have them as and when I need to grab a quick breakfast.

blueberrymuffin5Enjoy.

Almond Cake

Happy Lunar New Year!  I hope you had a fabulous time visiting family and friends and feasting on all the delicious food and snacks.

I spent two days visiting my relatives and I had a good time catching up with them.  We had a fun time sharing stories, giving out hongbaos and trying out each other’s bakes.  I brought the pineapple tarts that I made to my in-laws and grandmother’s house because they love pineapple tarts but can no longer make them.  I remember that when I was a child I would go to my grandmother’s house to help make pineapple tarts.  Those good old days will always be remembered dearly.  We made tray after tray of pineapple tarts to give to our relatives.  Now that Grandma is almost 90, it is time for me to make them for her each Chinese New Year.  I’m glad she likes my tarts.  She is a good cook and hearing her say she likes them is like receiving a pat on the back.

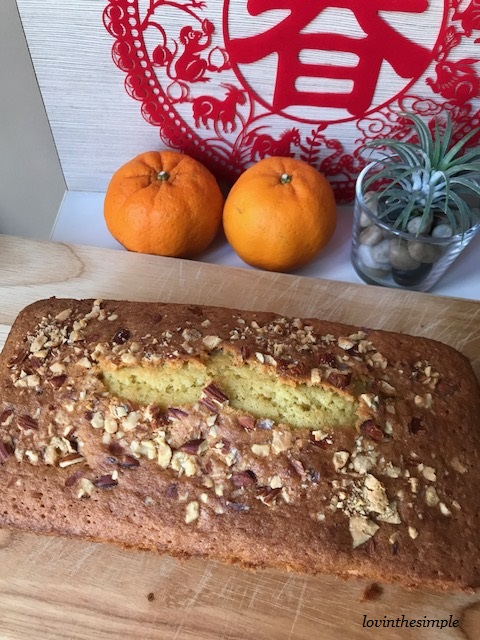
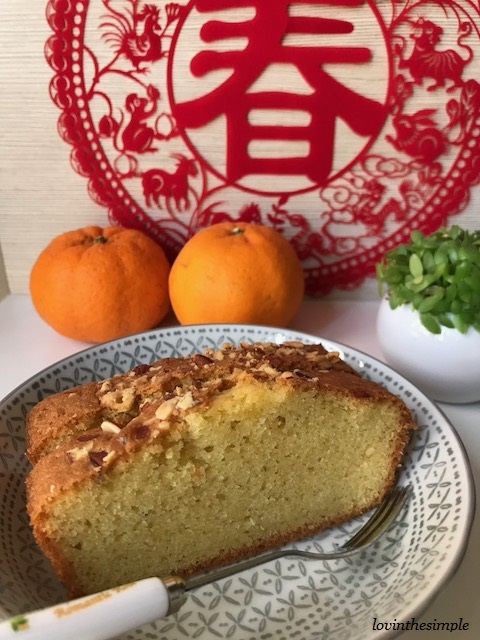
Coming from a small family, my visiting for Chinese New Year is finished.  If you have a big family with many relatives to visit and you are thinking of bringing a gift over to their house, I have a recommendation for you.  You can make an almond cake that everyone will love.  Whenever I bake this for someone I get good reviews for it. It is really delicious and moist.  The butter and ground almonds make this cake a winner.  The best part is everything can be mixed in one bowl.  It saves time in getting the mixer out and washing multiple dishes and utensils.  I use just a bowl and a hand whisk.

I bought ground almond to make almond cookies but never got around to it because I was making pineapple tarts (due to hot demand from the husband and daughter).  I doubt I will be baking almond cookies because my MIL has kindly bought us a box of almond cookies.  So today, I decided to make an almond cake using the ground almond meant for almond cookies.  I will be having this for tea later.  I hope you try this recipe and and get a thumbs-up for this cake.

almond cake1

almond cake 2

Almond Cake 

Ingredients (one loaf cake or 8″ cake):

  • 100g unsalted butter, bring to room temperature
  • 100g caster sugar
  • 3 large eggs, lightly beaten
  • 90g ground almonds (almond powder)
  • 40g cake flour
  • 1/2 teaspoon baking powder
  • 1/4 teaspoon baking soda
  • 1/4 teaspoon salt
  • 1 tablespoon fresh milk
  • 1 teaspoon vanilla
  • 1 tablespoon flaked or chopped almonds for garnishing

Directions:

  1. Pre-heat oven to 180 degrees celcius.
  2. Line a loaf pan with parchment paper at the bottom and lightly grease the sides of the pan.
  3. In a large bowl, cream butter and sugar with a hand whisk until it is light and fluffy.
  4. Add eggs and continue whisking.  Then add vanilla and fresh milk, whisking after each addition of ingredient.
  5. Sift over cake flour, baking powder, baking soda and salt into the bowl.  Fold to incorporate the flour and butter mixture.
  6. Add ground almonds and fold to incorporate everything.
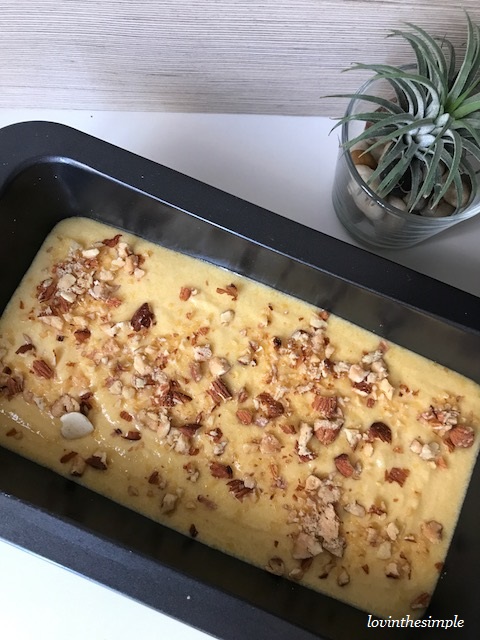
  7. Pour batter into the loaf pan and sprinkle flaked or chopped almonds.
  8. Bake in pre-heated oven for 30 – 35 minutes or until skewer inserted comes out clean.
  9. Allow the cake to cool completely before slicing.
  10. Enjoy!

almond cake3

almond cake orchids


Pineapple Tarts

Lunar New Year is approaching soon.  It will fall on 16 and 17 February this year.  Lunar New Year is also known as Chinese New Year or Spring Festival.  In the midst of all the preparations for Lunar New Year, I wanted to share my favourite New Year goodie with you.

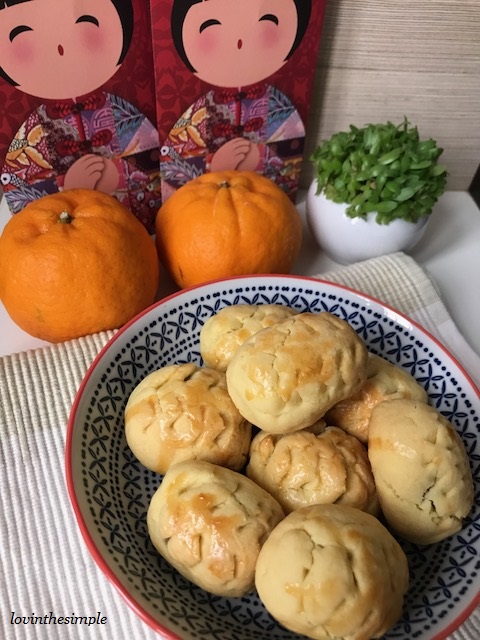
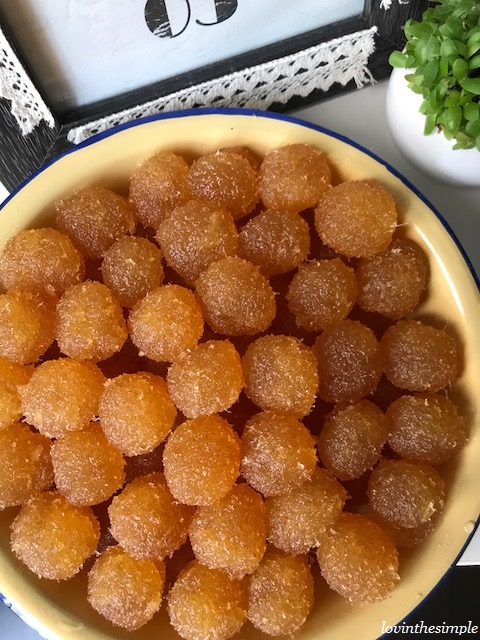
Pineapple tarts are my favourite of all the delicacies during this festive time.  They are buttery cookies wrapped with pineapple paste.  They taste fantastic because the buttery flavour goes wonderfully well with the sweetness and slight tartness of the pineapple paste.  Pineapple tarts don’t last long in my home.  Everyone loves them.  I’ll be making more for myself and my relatives.   Other than pineapple tarts, some of the typical goodies you can find at each house during Lunar New Year visiting are cashew cookies, almond cookies, love letters, kuih bangkit, green pea cookies, bak kwa, and yu sheng, just to name a few.

This year, we are welcoming the Year of the Dog.  There are twelve animals in the Chinese Zodiac.  During Lunar New Year, people visit their family and friends, bringing festive greetings to them.  It is customary to exchange two mandarin oranges with the relative or friend you are visiting as a gesture of exchanging well-wishes for the new year.  It is also a tradition for parents and married couples to give hong bao (red packets with money) to their children and family or friends’ children.  Adult children show their filial piety and appreciation to their parents by giving them hong bao along with mandarin oranges and other gifts they may wish to lavish on their parents.  One of the biggest highlights in the Lunar New Year celebration is the reunion dinner.  Every family member gathers together to have dinner on the eve of Lunar New Year.  Schools and offices end the day in the afternoon so that everyone has time to prepare for this important meal.

Lunar New Year is a tradition for all Chinese families.  There are a lot of preparations leading up to the New Year.  Families spring clean their homes, shop for decorations, stock up the fridge for the reunion dinner, bake cookies and shop for new clothes.  Before I get back to spring cleaning and making more pineapple tarts, here’s wishing all a Blessed Lunar New Year and Gong Xi Fa Cai!

tarts3

tarts2

Pineapple Tarts

Ingredients:

  • 227g unsalted butter, room temperature
  • 50g icing/confectioners sugar
  • 1 egg + 1 egg yolk, lightly beaten
  • 450g all-purpose flour
  • 1/2 teaspoon salt
  • 1 teaspoon vanilla
  • 500g pineapple paste, rolled into balls**
  • small amount of beaten egg for egg wash

** I used pre-made pineapple paste bought from the supermarket.  You could also make it from scratch.  There are many online recipes on making pineapple paste from scratch.  Here is a picture of a pack of pineapple paste.

Image result for pineapple paste

Directions:

  1. Sift icing sugar over unsalted butter. With an electric mixer cream butter and sugar together until light and fluffly, about 5 minutes.
  2. Dribble eggs into the mixture and continue mixing until everything comes together.
  3. Add salt and vanilla and continue mixing for about 1 minute.
  4. Sift flour into the mixture.  Combine flour and butter mixture until a dough is formed. Form dough into a ball and refrigerate for 30 minutes.
  5. Line two cookie sheets with parchment paper.
  6. Pre-heat oven to 175 degrees celcius.
  7. Remove dough from the fridge.  Form dough into a flat disc and place pineapple ball in the centre of the dough.  Seal the dough and roll into balls.
  8. Use a scissors to make incisions to resemble pineapple skin (optional).
  9. Apply egg wash on pineapple tarts and bake in pre-heated oven for 20 minutes.
  10. Allow pineapple tarts to cool completely before storing them in air-tight containers.


tarts5

Enjoy 


Loving the bread machine

Our family has bread almost everyday, for breakfast and sometimes tea.  We used to buy our bread from the supermarket and bakery until I started making them two years ago.  I decided to buy a bread machine as I was really keen to make bread but I wasn’t very good and strong in kneading dough.  It takes quite a bit of muscles to do the job well and I didn’t have the confidence in succeeding.

My bread machine has served up loaves of bread for us in this two years.  In addition to the delicious and nutritious loaves we enjoy up till now, it has also helped me knead nice dough so I could experiment and make bread buns and bread rolls.

These are the cheese buns I made yesterday.  I have found a good recipe for basic bread bun which I will share below.  You can tweak your fillings and toppings.  Have fun coming up with different buns!

cheesebun

Basic Bread Bun

(makes 8 buns)

recipe source: Cooking a Dream (with slight modifications)

Ingredients:

250g bread flour

3 tablespoons milk powder**

2 tablespoons caster sugar

3/4 teaspoon salt

1 egg, beaten

110ml cold water (** if you don’t have milk powder use 110ml fresh milk instead of cold water)

1 teaspoon instant yeast

40g unsalted butter

a little beaten egg for egg wash

Directions:

  1. Check the instructions of your bread machine and add the ingredients as per the machine’s instructions.  For my machine I have to add dry ingredients first followed by wet ingredients (all except for butter which is to be added later).  If you do not have a bread machine, you can use a mixer with a dough hook to knead the dough or you may also knead by hand.
  2. Select bread dough function to set the machine to knead the dough.
  3. Ten minutes into the kneading, add in the butter.
  4. Allow machine to continue kneading.  After the kneading is completed, you can allow the dough to proof in the machine or you may take out the dough and place it in a well oiled bowl to proof it.  I take mine out and proof it in a bowl covered with a plastic wrap or wet towel to prevent moisture loss.
  5. Allow dough to proof or double in size.  This takes about 1 hour in a warm environment.  Place the dough in a warm place in your house to proof.
  6. Once dough has proofed or doubled in size, do a window pane test to check if you are ready to proceed to the next step.  Alternatively you can press the dough deeply with a finger.  The depression should stay and your finger shouldn’t have any dough sticking on it.
  7. On a slightly floured surface, knead the dough by hand for 5 minutes to expel the gas in the dough.
  8. Cut the dough into equal sizes and roll them into balls.  Place each dough ball on a baking tray lined with parchment paper. Cover the dough balls with plastic wrap or a wet towel to prevent moisture loss.  Let them rest for 10 minutes.
  9. Take each dough ball, lightly knead to expel gas.  With a slightly floured rollling pin, roll the dough into a circular disc and add your filling in the centre of the disc.  Wrap the dough and pinch the bottom to seal the dough.  Repeat till all are done.  Cover the dough with plastic wrap or wet towel and let them rest for another 1 hour or till dough doubles in size.
    For the cheese buns I made, I rolled the dough into balls and let them rest for 1 hour.  At the end of the second proofing, I applied egg wash on each dough ball before adding shredded cheese on top of the egg wash.
  10. Preheat oven to 180 degrees.
  11. Apply egg wash over the dough balls.  This step is already done for the cheese buns I made.
  12. Bake for around 15 minutes or till lightly golden brown on the tops.
  13. Allow the bread to cool on a cooling rack.


Enjoy!

Butterless Chocolate Chip Cookies

I am loving this chocolate chip recipe that I found on Chef Savvy website.  The cookies taste absolutely fantastic and the texture is crisp on the outside and chewy inside.  I will be using this recipe from now on whenever there’s a demand for chocolate chip cookies.

This recipe is great because it uses coconut oil rather than butter.  Coconut oil is well known for its health benefits.  It is widely used in food and health care.  Composing of medium-chain triglycerides it is lower in calories than most oils.  There’s only a very slight hint of coconut in the cookies.  The taste is just great!  In fact, I personally prefer this version of chocolate chip cookies.  My food picky daughter also loved them.  She had five and asked to pack some for school.

coconut oil choc chip cookies 2

Butterless Chocolate Chip Cookies 

Ingredients (makes about 12 cookies):

11/2 cups all purpose flour

1 teaspoon baking soda

1/2 cup brown sugar

1/4 cup granulated sugar

1/4 teaspoon salt

1/2 cup semi-sweet chocolate chips

2 teaspoons vanilla

1 egg

1/2 cup coconut oil (not melted)

Directions:

  1. In an electric mixer beat coconut oil with brown sugar and caster sugar till everything is incorporated well.  I used a whisk to do this step.
  2. Add egg and continue mixing till well incorporated.
  3. Add vanilla and mix till well incorporated.
  4. Sift in all purpose flour, baking soda and salt into the mixture.  Mix till all the dry ingredients are combined.
  5. Fold in chocolate chips and form a soft dough.
  6. Refrigerate dough for 30 minutes.
  7. Preheat oven to 175 degrees.
  8. Line baking tray with parchment paper.
  9. Remove dough from fridge and roll them into balls and place them on the parchment paper.  Leave ample space between each cookie dough as the cookie will spread while baking.
  10. Bake for about 12 – 15 minutes.
  11. Place cookies on a cooling rack.  Store in air-tight cookie jar or container when they are cooled completely.

coconut oil choc chip cookies 1

Enjoy them with milk!  I’ll be making another batch soon.  Hope you like them too ♥

coconut oil choc chip cookies 3

recipe source: Chef Savvy


Time for some Cookies

Sometime ago I realised I haven’t used the cookie stamp I bought from our vacation to Brisbane a few years back.  The cookie stamp was quite an impulsive purchase, definitely something I wouldn’t buy now because I already owned some really beautiful cookie cutters handed down to me by my granny.

Since staying at home full time, I have been conscious with my spending, always asking myself whether I needed an item before buying it and whether I already have a similar one lying at home.  I don’t buy anything straightway anymore, rather I would go home and get about my usual activity.  If I really needed the item, it would surely pop up in my mind.  So no more impulse shopping for me.  I feel this change leads to less unwanted, unused things in my house, less clutter, less cleaning and a simpler life for me.

Oh, back to the cookie stamp.

I made some yummy butter cookies.  This is a really simple recipe.  Give it a try because the cookies are really good and the cookie jar will be empty in no time.

cutoutcookies1

Cut-Out Butter Cookies

Ingredients:

(makes about 36 pieces depending on the cookie stamp/cutter size)

100g unsalted butter, softened at room temperature

80g caster sugar

1 egg yolk

180 cake flour

20g corn flour

Steps:

Sift cake flour and corn flour together and set aside.  Line baking tray with parchment paper and set aside.

With an electric mixer, add in sugar to the butter in 3 additions and cream till the mixture turns light and fluffy.

Add in egg yolk and mix well.

Add sifted flour mixture in 3 additions, stir with a spatula to form a soft dough.

Place dough in a plastic bag and flatten with a rolling pin.

Refrigerate the dough for 30 minutes.

Remove dough from the fridge and roll it on a slightly floured surface and cut out with slightly floured cookie cutter.

Line the cut-out cookie dough with some space between each cookie on the baking tray as they will spread a little while baking.

Preheat oven to 170 degrees.

Bake in pre-heated oven for 15 minutes.

Cool them on a cooling rack and store in air-tight cookie jar or container.