Marble Cake

It has been a tough week.  I feel a little under the weather and bothered by a problem.  It has been a few days since I started feeling unmotivated.  Today, I said to myself is time to get past moody feelings and start getting things done.  I haven’t been baking much.  Since baking is therapeutic for me, I decided to make something and start feeling productive again.

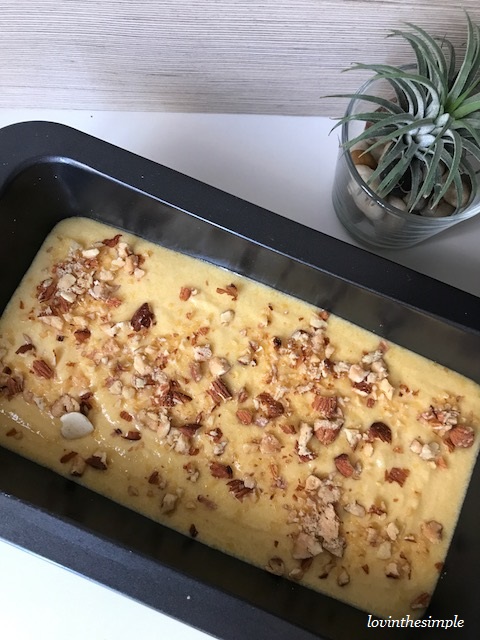
I didn’t take long to decide to make a marble cake because the whole family loves it.  But I didn’t have butter.   I did have a new jar of coconut oil so I went ahead to make marble cake with coconut oil.  I second guessed the cake would turn out well since my muffins made with coconut oil always turn out alright.  I prepped everything and sent the loaf cake to bake in the oven.  As I went around doing my chores, the aroma from the kitchen wafted and make me sense that I would have a nice dessert that afternoon.

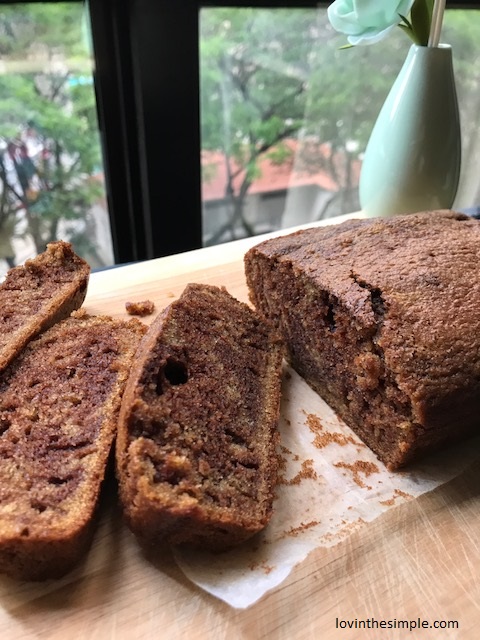
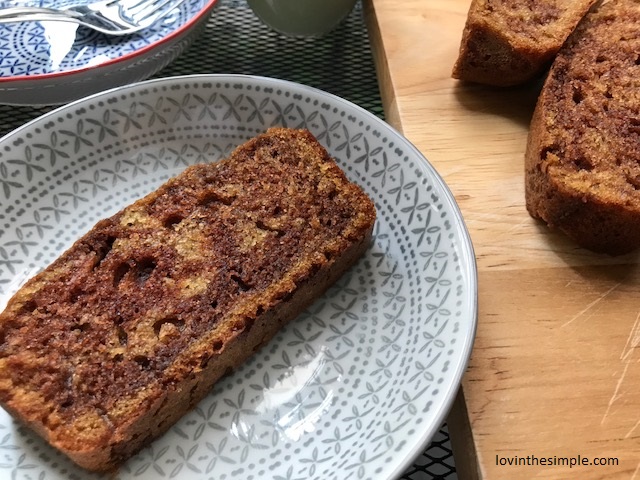
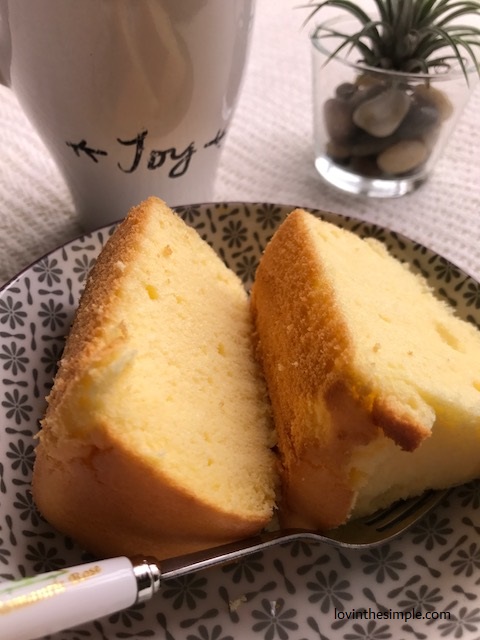
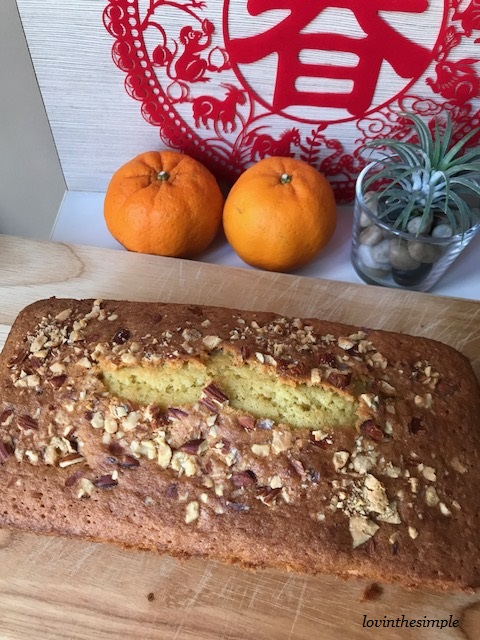
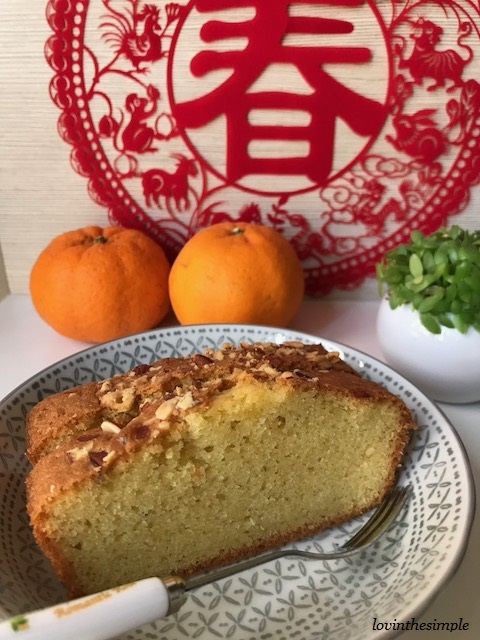
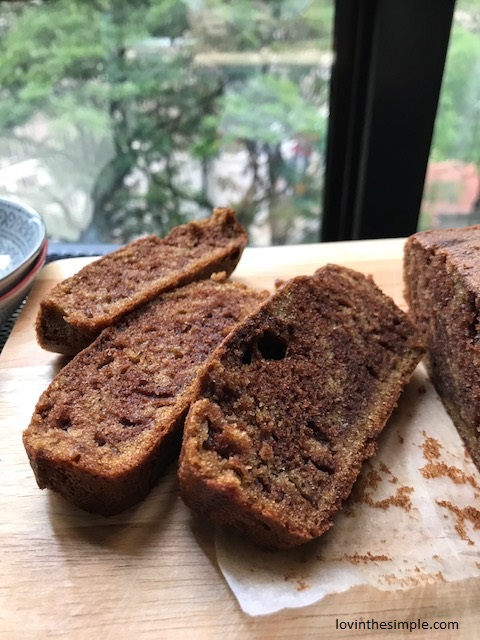
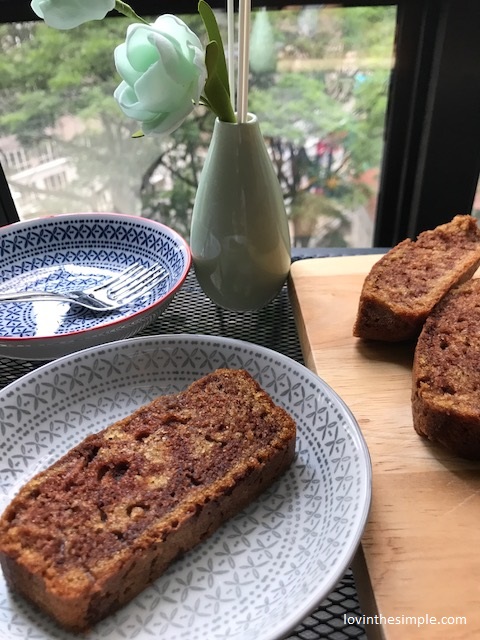
When the cake finished baking in about 35 minutes, I let it cool completely before cutting it.  I was so happy the cake turned out very moist and delicious.  The only disappointment was the marbling of the cake.  It wasn’t prominent at all.  I used brown sugar in the main batter which made the cake turn out darker.  I should have used white sugar.  But since the cake tasted great, I thought I would share the recipe.

marble1

marble3

Coconut Oil Marble Cake

Ingredients (one loaf cake):

  • 100g all-purpose flour
  • 100g granulated sugar
  • 100ml coconut oil
  • 100ml milk
  • 2 eggs
  • 1 teaspoon baking powder
  • 1/2 teaspoon baking soda
  • 1/4 teaspoon salt
  • 2 teaspoons unsweetened cocoa
  • 1 teaspoon vanilla

Directions:

  1. Pre-heat oven to 175°C.
  2. Line loaf tin with parchment paper or lightly grease the tin.
  3. Sift all-purpose flour, baking powder, baking soda and salt and set aside.
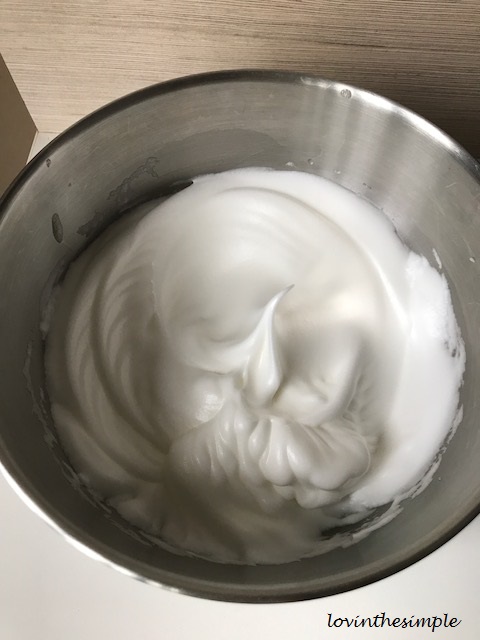
  4. Using a hand whisk, beat sugar and coconut oil till all the sugar is dissolved.
  5. Add eggs and whisk to combine.
  6. Add vanilla and milk and whisk to combine.
  7. Add flour mixture and fold till everything is well combined and there are no traces of flour.
  8. Pour half of the batter into another clean and dry mixing bowl.  Set aside the other half.  You would have two bowls of batter.
  9. Sift cocoa powder over one of the bowls and fold to incorporate everything.  Make sure there are no traces or lumps of cocoa.
  10. Pour the batter into the loaf tin by alternating between the two bowls of batter.  Repeat till all batter is used.
  11. Use a knife or skewer to make swirls through the batter for a marble effect.
  12. Bake in preheated oven for around 35 – 40 minutes.  Check doneness by using a skewer to insert into the centre of the cake.  If the skewer comes out clean the cake is done.
  13. Transfer the cake to a cooling rack and slice when fully cooled.

marble2


marble4

Lemon Chiffon Cake

A light and airy cake is on the menu today.  It’s a cool day with overcast skies.  A respite from the tropical heat experienced over the last few days.  I really welcome the slight drizzle and the cool breeze with big open arms.  Walking my dog today has been so pleasant.

The weather has put me in a good mood to bake a lemon chiffon cake.  I hadn’t had a chiffon cake for many months.  The cake turned out pleasantly, light and airy with a tinge of fresh lemon scent.  I love it.  The recipe is pretty simple and uncomplicated.  I used the juice of half a lemon and some lemon rind to flavour the cake.  The other ingredients are the standard egg yolks, egg whites, vegetable oil, caster sugar and cake flour.  For the meringue, I beat my egg whites till they are at soft peak stage.  The cake rose beautifully and shrank just a little while cooling (this is normal).  The cake tasted light and refreshing and is a perfect pairing with tea or coffee.  I’m thankful for this simple enjoyment I have today.

lemonchiffon1

lemonchiffon2

Lemon Chiffon Cake

Ingredients (for a 17cm chiffon cake pan):

  • 3 egg yolks
  • 15g caster sugar
  • 20ml fresh milk
  • 40ml vegetable oil (I used canola oil)
  • 15ml lemon juice (about juice of 1/2 lemon)
  • 1/2 teaspoon lemon rind
  • 70g cake flour
  • 1/2 teaspoon baking powder
  • 3 egg whites
  • 45g caster sugar

Direction:

  1. Preheat oven to 170C.
  2. Using a hand whisk, mix egg yolks and 15g sugar until all the sugar is dissolved.
  3. Add milk and continue to whisk.  Then add lemon juice and lemon rind, whisk to combine.
  4. Add vegetable oil and whisk to combine everything.
  5. Add cake flour and baking powder and use a spatula to fold the flour into the wet mixture.  Set aside.
  6. Using an electric mixer, beat egg whites until they become frothy.  Add 45g sugar in 3 parts, beating until you get soft peaks.
  7. Take 1/3 of the meringue and fold into the egg yolk mixture.  Make sure that the meringue is completely folded in.  Repeat with another 1/3 until all the meringue is folded completely into the egg yolk mixture.
  8. Pour batter into chiffon cake pan.  The cake pan doesn’t need any parchment paper or greasing.
  9. Tap the cake pan on the counter a few times to release any air bubbles trapped in the batter.
  10. Bake in preheated oven for 30 minutes.
  11. When the cake is done, remove from the oven carefully and immediately invert the cake pan on the base of a cup or bowl.  This step is important so that the cake doesn’t collapse.
  12. Let the cake cool completely.  This takes about 1 hour.
  13. When the cake has cooled, turn the cake pan over and use a thin bladed knife to run through the rim to release the cake.
  14. Slice cake and store in an air-tight container.


lemonchiffon3

Chewy Chocolate Chip Oatmeal Cookies

I love a good chocolate chip cookie and one that is lower in calories makes me happier.  I can eat one or two more without feeling too guilty.  Okay, I try not to eat more than three in a day.  I made a small batch of chocolate chip oatmeal cookies yesterday.  Most recipes call for both brown and white sugar but I used only brown sugar for this one.  I have sensitive teeth and I can’t go for anything that is very sweet.  Plus it is healthier to use less sugar.  Personally, I found the sweetness just right because the semi-sweet chocolate chips added sweetness to each bite. It was a right balance for me.  I also used coconut oil instead of butter so that the cookies will be a tad healthier without compromising taste.

Indeed, these cookies taste really good and they make a great snack for school, work or home.  It was so easy to whip up as well.  It took about twenty minutes to prep, and another twelve minutes to bake.  And I only had to wash one bowl.  Wow!  The weather these days is 34C and staying in the kitchen for too long is not so fun so I really like something easy and simple like this.

chocochipoatmealcookies1

Chewy Chocolate Chip Oatmeal Cookies

Ingredients (about 1 dozen cookies):

  • 1/3 cup coconut oil
  • 1/2 cup packed light brown sugar
  • 1 teaspoon vanilla
  • 3/4 cup all-purpose flour
  • 1/2 cup instant oats
  • 1/2 teaspoon baking powder
  • 1/2 teaspoon salt
  • 1 egg
  • 1/2 cup semi-sweet chocolate chips

Directions:

  1. Preheat oven to 175C.
  2. Line a baking sheet with parchment paper.
  3. Whisk coconut oil and light brown sugar till well incorporated using a hand whisk.
  4. Add egg and then vanilla and mix well.
  5. Sift over all-purpose flour, baking powder and salt over the wet mixture.  Using a spatula, fold everything well, then add oats and chocolate chips.  Fold till well incorporated.
  6. Spoon cookie batter onto baking sheet.  Space them out to allow cookies to spread while baking.
  7. Bake for 12 minutes or till golden brown.
  8. Allow cookies to cool completely and store in an air-tight jar or container.

chocochipoatmealcookies2

chocochipoatmealcookies3

Almond Cake

Happy Lunar New Year!  I hope you had a fabulous time visiting family and friends and feasting on all the delicious food and snacks.

I spent two days visiting my relatives and I had a good time catching up with them.  We had a fun time sharing stories, giving out hongbaos and trying out each other’s bakes.  I brought the pineapple tarts that I made to my in-laws and grandmother’s house because they love pineapple tarts but can no longer make them.  I remember that when I was a child I would go to my grandmother’s house to help make pineapple tarts.  Those good old days will always be remembered dearly.  We made tray after tray of pineapple tarts to give to our relatives.  Now that Grandma is almost 90, it is time for me to make them for her each Chinese New Year.  I’m glad she likes my tarts.  She is a good cook and hearing her say she likes them is like receiving a pat on the back.

Coming from a small family, my visiting for Chinese New Year is finished.  If you have a big family with many relatives to visit and you are thinking of bringing a gift over to their house, I have a recommendation for you.  You can make an almond cake that everyone will love.  Whenever I bake this for someone I get good reviews for it. It is really delicious and moist.  The butter and ground almonds make this cake a winner.  The best part is everything can be mixed in one bowl.  It saves time in getting the mixer out and washing multiple dishes and utensils.  I use just a bowl and a hand whisk.

I bought ground almond to make almond cookies but never got around to it because I was making pineapple tarts (due to hot demand from the husband and daughter).  I doubt I will be baking almond cookies because my MIL has kindly bought us a box of almond cookies.  So today, I decided to make an almond cake using the ground almond meant for almond cookies.  I will be having this for tea later.  I hope you try this recipe and and get a thumbs-up for this cake.

almond cake1

almond cake 2

Almond Cake 

Ingredients (one loaf cake or 8″ cake):

  • 100g unsalted butter, bring to room temperature
  • 100g caster sugar
  • 3 large eggs, lightly beaten
  • 90g ground almonds (almond powder)
  • 40g cake flour
  • 1/2 teaspoon baking powder
  • 1/4 teaspoon baking soda
  • 1/4 teaspoon salt
  • 1 tablespoon fresh milk
  • 1 teaspoon vanilla
  • 1 tablespoon flaked or chopped almonds for garnishing

Directions:

  1. Pre-heat oven to 180 degrees celcius.
  2. Line a loaf pan with parchment paper at the bottom and lightly grease the sides of the pan.
  3. In a large bowl, cream butter and sugar with a hand whisk until it is light and fluffy.
  4. Add eggs and continue whisking.  Then add vanilla and fresh milk, whisking after each addition of ingredient.
  5. Sift over cake flour, baking powder, baking soda and salt into the bowl.  Fold to incorporate the flour and butter mixture.
  6. Add ground almonds and fold to incorporate everything.
  7. Pour batter into the loaf pan and sprinkle flaked or chopped almonds.
  8. Bake in pre-heated oven for 30 – 35 minutes or until skewer inserted comes out clean.
  9. Allow the cake to cool completely before slicing.
  10. Enjoy!

almond cake3

almond cake orchids


Japanese Cheesecake

I’m baking a super soft, smooth, melt-in-the-mouth, delicious, light cheesecake for my daughter today.  She’s getting a little bit of blues having to go back to school after the long school holiday break.  I hope she cheers up because this is her favourite cake.  She loves all things chilled.  And this cake is perfect when chilled.  It’s so delicious and light it’s hard to stop at one slice.   It’s an absolute winner in our family.  I’m looking forward to having a relaxing tea time with my gal.

The method in which this cake is made is similar to a chiffon cake.  You will need to mix meringue into the egg yolk batter.  Patience is required to enjoy a slice of Japanese cheesecake.  From preparation to baking, to slicing the cake takes a few hours.  But I think it is worth it because it is so heavenly.  You need to set aside time to melt the cream cheese, let it cool and pass it through a strainer, prepare the meringue and let the cake bake for one hour then cool for another 1 to 11/2 hours before you can serve it.  If you intend to make this for a party, it will be better to prepare it one day before so you have time to chill it in the fridge.

cheesecake2

Japanese Cheesecake

Ingredients (for an 8 inch cake):

250g cream cheese

50g unsalted butter

50g milk


6 egg yolks, at room temperature

50g milk

60g cake flour

20g corn flour

1/2 teaspoon salt


3 egg whites, at room temperature

1/4 teaspoon cream of tartar

140g caster sugar


Directions:

  1. Preheat oven to 150 degrees celcius.
  2. Over a bain marie/double boiler, melt cream cheese, butter and milk together to get a smooth creamy consistency.  Use a wooden spoon to stir the mixture.  When done, remove from the double boiler and leave to cool.
  3. In a mixing bowl, beat the egg yolks with a hand whisk lightly.  Add milk and continue to whisk lightly.
  4. Sieve in cake flour, corn flour and salt into the egg yolk mixture.  Fold to incorporate well.
  5. Pass the cream cheese mixture that has cooled through a strainer/sieve for a smoother consistency and to remove lumps from the mixture.  Note: This step is important for a smooth and velvety cake.
  6. Fold the cream cheese mixture into the egg yolk mixture till everything is well incorporated.
  7. In a separate mixing bowl and with an electric mixer, beat egg whites till foamy.  Add in cream of tartar and continue beating.  Add sugar in three additions to the egg whites and beat till soft peaks are achieved.
  8. Mix 1/3 of the meringue with the egg yolk and cream cheese batter, then fold the rest of the meringue into the batter.   Make sure everything is well combined.
  9. Pour into an 8 inch cake pan lined with parchment paper at the bottom.  Tap the cake pan against the counter a few times to release any air bubbles.
  10. Prepare water bath by adding about 1 inch of hot water into a big cake pan (must be larger than the cake pan you are using for the batter).  Then put the 8 inch cake pan into the bigger cake pan with hot water.
  11. Bake in pre-heated oven for one hour.
  12. At the end of one hour, turn off the oven and let the cake stay inside the oven with the door closed for 30 minutes.  Do not open the oven door as the sudden change in temperature will cause the cake to shrink.
  13. After 30 minutes, open the oven door slightly to allow the cake to cool in the oven.  Leave the cake in the oven for one hour.
  14. After one hour has passed, take the cake out and let it cool on a wire rack.
  15. Once the cake has been cooled completely, slice with a sharp knife.  Clean the knife with a kitchen towel after each slice for clean and presentable slices.
  16. Store them in air-tight containers and chill them in the fridge.
cheesecake3
Melting cream cheese, butter and milk over a double boiler
cheesecake4
Cooling the cream cheese mixture.  Notice that the consistency is lumpy so it will have to be strained for smooth consistency.
cheesecake5
Meringue with soft peaks


cheesecake6
Water bath (sorry, the water can’t be seen from the picture)

And this is how my cake turned out:

cheesecake1

Oops, this is real life!  A cake with cracks on the top.  I dusted the top with some icing sugar to make it look a little better.  Don’t think it worked though.  But trust me, it is true when they say don’t judge a book by its cover.  This is super yummy, soft, smooth, cottony, and not overly sweet.

Have a nice day!


Chocolate Macarons

macaronspic1

Macarons, you’re beautiful but too hard for me to understand.  I love to look at your “feet” and your coloured smooth “faces”.  You are sweet to the taste buds but too fickle and difficult sometimes.  And I am sorry that I have to give up after too much wasted ingredients.  At least for now.  I feel sorry for wasting resources.

I’ve only had two successes in making macarons.  Both times are chocolate macarons.  Though the ingredients for macarons are few, it requires technique to get the batter right.  After my success with chocolate macarons, I took the next step to make coloured ones.  I tried making green and pink ones but they turned out disastrous!  No feet, cracked and flat!  So after many wasted tries, I’ve stopped making them.  It’s nerve wrecking each time I stand in front of the oven anticipating feet.  I still haven’t figured out why I failed.  I think I just haven’t mastered the macaronage well or the shells aren’t dried out completely before I sent them to the oven.  Macaronage is the stage in preparing French macaron shells where the batter is worked until smooth, shiny and flowing.  I don’t know when I will make macarons again. Hopefully soon! I admire those who are able to make batches after batches of macarons, all in different colours and fillings.  They are amazing!

Chocolate Macarons

Ingredients:

100g icing sugar

50g almond powder

25g unsweetened dutch-processed cocoa powder

2 large egg whites, room temperature

65g caster sugar

Directions:

  1. Preheat oven to 150 degree celcius.
  2. Line 2 baking trays with parchment paper and have a pastry bag with a plain tip (about 1/2 inch) ready.
  3. Grind together icing sugar with almond powder and cocoa powder so there are no lumps, using a blender or food processor.
  4. Sieve the mixture to further ensure there are no lumps and that mixture is very fine.
  5. In a bowl of a standing electric mixer, beat the egg whites till they are foamy.  Add sugar in 4 batches and whip egg whites till they are very stiff and firm.
  6. Carefully fold in the dry ingredients in 2 batches into the egg white mixture with a rubber spatula.  When the mixture is just smooth and there are no streaks of egg white, stop folding and scrape the batter into the pastry bag (standing the bag in a tall glass helps if you’re alone).
  7. Pipe the batter on the parchment-lined baking trays in 1-inch circles (about 1 tablespoon each of batter), evenly spaced one-inch apart.
  8. Tap the baking trays a few times firmly on the counter to flatten the batter then let the macaron batter dry out so that when you touch the surface, it doesn’t stick to your finger.  This takes around one hour.
  9. When the surface of the macaron batter is dry, bake them for 15-18 minutes.  Let them cool completely then remove from baking tray.
  10. Pipe your choice of filling and enjoy!

Filling:

1 portion of Nutella or Vanilla Buttercream

Vanilla Buttercream Filling

Ingredients:

56g unsalted butter

90g icing sugar

1 teaspoon milk

1/2 teaspoon vanilla extract

Directions:

  1. Using a hand mixer or a stand mixer, cream butter until soft and smooth.
  2. Add powdered sugar, milk, and vanilla and mix until light and fluffy.


macaronspic2


macaronspic3

Recipe for macaron shells with slight modifications from http://www.davidlebovitz.com

Recipe for vanilla buttercream from http://www.aheadofthyme.com


Baking a Chiffon Cake

I wanted to bake a cake this week.  I wanted to make something light and I thought of chiffon cake immediately.  I had not baked a chiffon cake for a few months and I started thinking of the flavour.  I had lemons on hand and almost went with it.  Then I thought – If I went with lemons I would have leftover cake because not everyone in my family likes a citrus cake.  The other choice that was playing in my mind was Pandan Chiffon.  Ok, Pandan Chiffon would be a hit in our household.

If you live in Singapore or visited Singapore, you will know that Pandan chiffon is the most famous of all chiffon cakes.  This pastel green, feather-light, cottony cake is aromatic and flavourful.  The texture is soft and cottony and the taste is sweet and fragrant.  The fragrance comes from the cake’s star ingredient – Pandan, also known as Screwpine Leaf in some parts of the world.  Locally, we call this leaf Pandan.  It is a tropical plant used in a lot in South East Asia cooking.  It is almost always paired with coconut milk in South East Asian cooking.  In Pandan Chiffon Cake, coconut milk goes hand in hand with Pandan.

Image result for pandan leaf

Pandan/ScrewpineLeaves

I managed to get Pandan leaves and coconut milk at the market and made Pandan Chiffon yesterday.  Pandan leaves can be grown at home and can be easily found at supermarkets and wet markets in Singapore.  If you are living in other parts of the world and would like to try Pandan Chiffon, you can try to see if the Asian supermarkets sell the leaves or perhaps some bakeries do have Pandan Chiffon.

Pandan Chiffon Cake (17cm chiffon pan)

Ingredients:

90g cake flour

1 teaspoon baking powder

25g granulated sugar

3 egg yolks

100ml pandan coconut milk**

11/2 tablespoon vegetable oil **

3 egg whites

50g granulated sugar

Notes:

** To make 100ml pandan coconut milk, blend 120ml of coconut milk with at least 8 blades of pandan leaves.  Cut the pandan leaves into small pieces before blending.

** I used canola oil, do not use olive oil as the taste will turn out differently.  Use light flavoured oils such as canola or sunflower.

** Do not oil or grease the chiffon cake pan because the cake needs to stick to the sides of the pan to rise.

pandanchiffon1


pandanchiffon2

Directions:

  1. Make pandan coconut milk by blending 120ml coconut milk with at least 8 blades of pandan leaves cut into small pieces.  Using a sieve, strain to get 100ml of pandan coconut milk.
  2. Separate egg yolks and whites and leave them till they reach room temperature.  (Tip: use eggs from the refrigerator as they are easier to separate than those left in room temperature)
  3. Whisk egg yolks with 25g granulated sugar till light and airy.
  4. Stir in vegetable oil followed by pandan coconut milk.  Stir till well combined.
  5. Sieve cake flour and baking powder over egg yolk mixture.  Fold to incorporate well with the egg yolk and pandan coconut milk.
  6. Preheat oven to 170 degree celcius.
  7. Using an electric mixer, beat egg whites till foamy.  Add 50g sugar in thirds, each time beating well on medium speed.  Beat till stiff peaks form.  One way to test if egg whites or meringue has reached stiff peaks is to overturn the bowl.  The egg whites/meringue will stick to the bowl and not fall out.pandanchiffon3
  8. Take about one third of the beaten egg whites/meringue and fold into the egg yolk mixture. Fold till there are no traces of egg whites.  Light and swift folds are required so as not to deflate the egg whites.
  9. Next, take another one third and fold into the egg yolk mixture.
  10. Finally take the last third and fold into the mixture ensuring that everything is well incorporated and no traces of egg whites are present.
  11. Pour batter into chiffon cake pan.
  12. Tap the cake pan on the counter a few times to break any air bubbles in the batter.
  13. Bake for 30 minutes.  The cake will rise above the cake pan whilst baking.  This is normal.
  14. Remove from the oven and immediately invert the cake pan on an overturned cup.  This is to prevent the cake from collapsing.
  15. Let it cool completely for at least one to one and a half hours before removing from the cake pan.
  16. Use a thin bladed knife to run along the cake pan to release the cake.
  17. Cut into slices and enjoy.

pandanchiffon7

Butterless Chocolate Chip Cookies

I am loving this chocolate chip recipe that I found on Chef Savvy website.  The cookies taste absolutely fantastic and the texture is crisp on the outside and chewy inside.  I will be using this recipe from now on whenever there’s a demand for chocolate chip cookies.

This recipe is great because it uses coconut oil rather than butter.  Coconut oil is well known for its health benefits.  It is widely used in food and health care.  Composing of medium-chain triglycerides it is lower in calories than most oils.  There’s only a very slight hint of coconut in the cookies.  The taste is just great!  In fact, I personally prefer this version of chocolate chip cookies.  My food picky daughter also loved them.  She had five and asked to pack some for school.

coconut oil choc chip cookies 2

Butterless Chocolate Chip Cookies 

Ingredients (makes about 12 cookies):

11/2 cups all purpose flour

1 teaspoon baking soda

1/2 cup brown sugar

1/4 cup granulated sugar

1/4 teaspoon salt

1/2 cup semi-sweet chocolate chips

2 teaspoons vanilla

1 egg

1/2 cup coconut oil (not melted)

Directions:

  1. In an electric mixer beat coconut oil with brown sugar and caster sugar till everything is incorporated well.  I used a whisk to do this step.
  2. Add egg and continue mixing till well incorporated.
  3. Add vanilla and mix till well incorporated.
  4. Sift in all purpose flour, baking soda and salt into the mixture.  Mix till all the dry ingredients are combined.
  5. Fold in chocolate chips and form a soft dough.
  6. Refrigerate dough for 30 minutes.
  7. Preheat oven to 175 degrees.
  8. Line baking tray with parchment paper.
  9. Remove dough from fridge and roll them into balls and place them on the parchment paper.  Leave ample space between each cookie dough as the cookie will spread while baking.
  10. Bake for about 12 – 15 minutes.
  11. Place cookies on a cooling rack.  Store in air-tight cookie jar or container when they are cooled completely.

coconut oil choc chip cookies 1

Enjoy them with milk!  I’ll be making another batch soon.  Hope you like them too ♥

coconut oil choc chip cookies 3

recipe source: Chef Savvy


Time for some Cookies

Sometime ago I realised I haven’t used the cookie stamp I bought from our vacation to Brisbane a few years back.  The cookie stamp was quite an impulsive purchase, definitely something I wouldn’t buy now because I already owned some really beautiful cookie cutters handed down to me by my granny.

Since staying at home full time, I have been conscious with my spending, always asking myself whether I needed an item before buying it and whether I already have a similar one lying at home.  I don’t buy anything straightway anymore, rather I would go home and get about my usual activity.  If I really needed the item, it would surely pop up in my mind.  So no more impulse shopping for me.  I feel this change leads to less unwanted, unused things in my house, less clutter, less cleaning and a simpler life for me.

Oh, back to the cookie stamp.

I made some yummy butter cookies.  This is a really simple recipe.  Give it a try because the cookies are really good and the cookie jar will be empty in no time.

cutoutcookies1

Cut-Out Butter Cookies

Ingredients:

(makes about 36 pieces depending on the cookie stamp/cutter size)

100g unsalted butter, softened at room temperature

80g caster sugar

1 egg yolk

180 cake flour

20g corn flour

Steps:

Sift cake flour and corn flour together and set aside.  Line baking tray with parchment paper and set aside.

With an electric mixer, add in sugar to the butter in 3 additions and cream till the mixture turns light and fluffy.

Add in egg yolk and mix well.

Add sifted flour mixture in 3 additions, stir with a spatula to form a soft dough.

Place dough in a plastic bag and flatten with a rolling pin.

Refrigerate the dough for 30 minutes.

Remove dough from the fridge and roll it on a slightly floured surface and cut out with slightly floured cookie cutter.

Line the cut-out cookie dough with some space between each cookie on the baking tray as they will spread a little while baking.

Preheat oven to 170 degrees.

Bake in pre-heated oven for 15 minutes.

Cool them on a cooling rack and store in air-tight cookie jar or container.