Chocolate Banana Oatmeal Muffins

chocbananaoatmeal2

I’m trying to get into a zero-waste mode.  I hate to throw food away.  There’s always a wave of guilt when I don’t have a choice but to throw the food away either because it is way past the expiration date or when it has wilted and turned bad.  I think of the money wasted and also the countless number of people around the world who are starving and malnourished.  I feel compelled to be more responsible in finishing the food we purchase and to buy only what we really need.  Some of the simple steps I’ve taken to minimise wastage are as follow.

  • Do a stock-take of the fridge and pantry before grocery shopping
  • Jot down the items that need to be replenished
  • Menu plan for the week
  • Jot down the ingredients required to make the meals for the week
  • Stick to the grocery list and do not buy anything that’s not in the list
  • Finish leftovers asap, preferably by the next day to avoid having to throw the food if it goes bad
  • Wash fruit like berries with water and some white vinegar to prolong their shelf life
  • Wrap vegetables with tea towel so that the excess moisture is absorbed by the towel and the vegetables last longer

Let me know if there are other ways in which I can improve on my journey to zero-waste.  Back to the muffins…

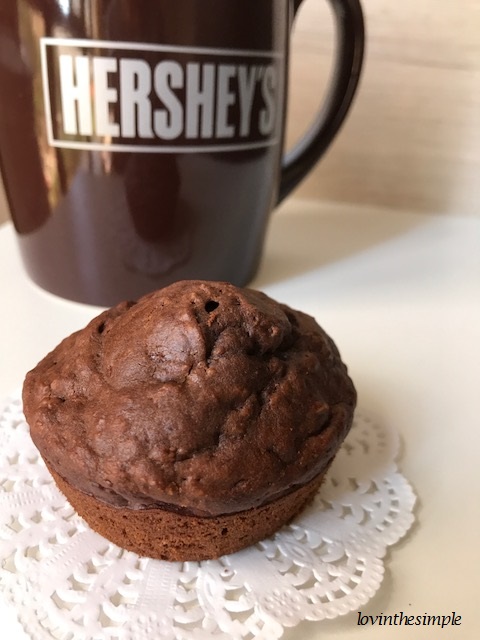
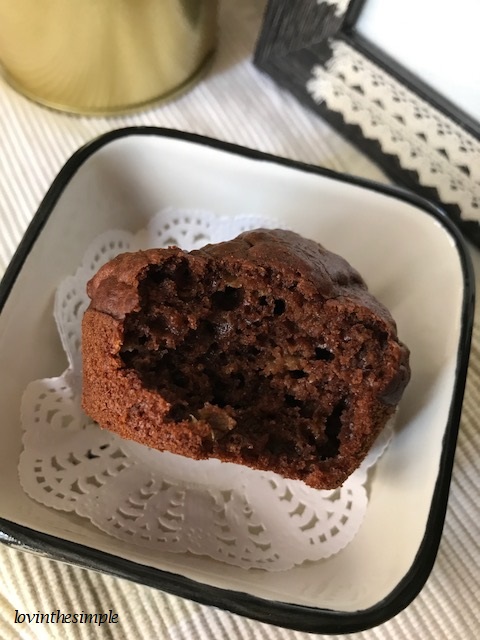
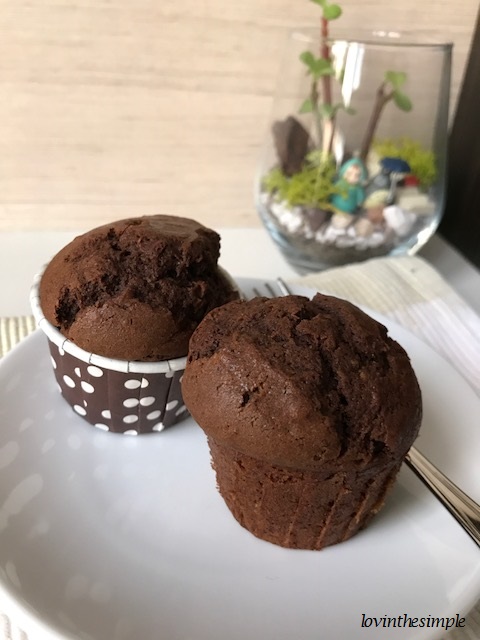
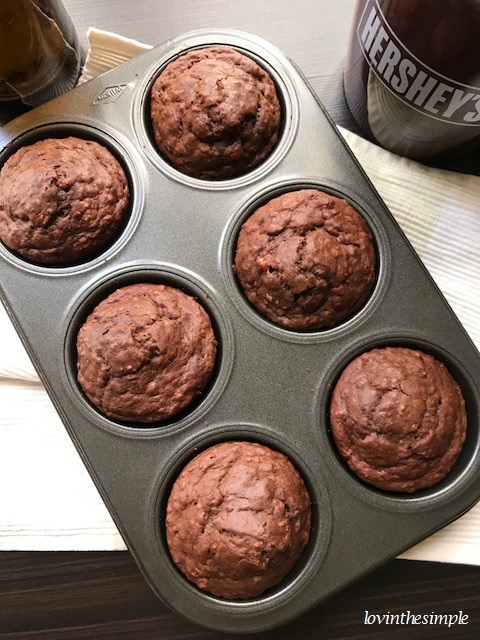
After I made Cookie a batch of banana oatmeal dog treats, I used the last over-riped banana to make chocolate banana oatmeal muffins for our breakfast the following morning.  I tweak my muffin recipes quite frequently based on what I have in my pantry.  Sometimes I add almond meal, oatmeal, or wholewheat flour to the dry ingredients mix.  In terms of oils, sometimes it will be coconut oil, vegetable oil or melted butter.  It depends on what I have.  I rarely buy an ingredient to make a one-off bake.  The ingredient will be left to waste so I prefer to use what I have on hand.

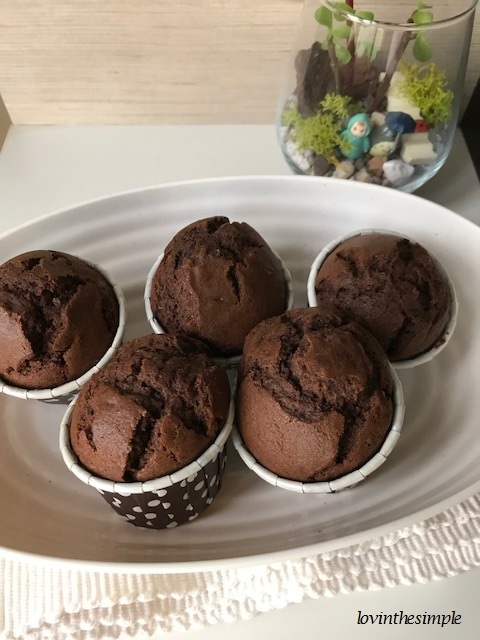
Chocolate Banana Oatmeal Muffins (make 6 muffins)

Ingredients:

Dry Ingredients:

  • 70g all-purpose flour
  • 20g unsweetened cocoa
  • 30g instant oats
  • 50g brown sugar
  • 1/2 teaspoon baking powder
  • 1/4 teaspoon baking soda
  • 1/4 teaspoon salt

Wet Ingredients:

  • 1 egg
  • 30ml coconut oil
  • 50ml milk
  • 1 over-riped banana, mashed
  • 1 teaspoon vanilla

Directions:

  1. Preheat oven to 175 degrees celcius.
  2. Line muffin tin with cupcake liners.
  3. Sift all-purpose flour, cocoa, baking powder, baking soda and salt into a large bowl.  Add oats into the mix, stir the mix and set aside.
  4. In a separate bowl, whisk egg and sugar together till light and fluffy.
  5. Add banana and continue whisking.  Then add milk, vanilla and coconut oil, whisking lightly after each addition of ingredient.
  6. Make a well in the centre of the bowl of dry ingredients.
  7. Pour wet ingredients into the well and fold the ingredients together till well incorporated.  Do not over-fold the batter.
  8. Spoon batter into cupcake liners till 2/3 full.
  9. Bake for 20 minutes or till skewer comes out clean.
  10. Allow muffins to cool and enjoy.
  11. Store extras in air-tight container.  You can make extras and store in the freezer for subsequent days breakfast.  Take them out to thaw and pop them in the oven to warm them up.

chocbananaoatmeal1

chocbananaoatmeal3

3 ingredients dog treat

Today I made Cookie a delicious and nutritious treat using just three ingredients – oat, banana and coconut oil.  Simple ingredients and straightforward method.  I just mixed everything together and baked the treats for 15 minutes and they were ready.  Cookie was following me around after I took them out from the oven.  Her doggy instincts must have told her these were for her.  I haven’t made these before but I have made her sweet potato, apple and carrot and peanut butter treats.  I don’t prefer to buy dog treats from the stores because I feel homemade treats are fresher and more wholesome.  Most days, I give Cookie fresh fruit and vegetables as treats.  She loves apples, carrots, watermelons, blueberries, strawberries and cucumbers.  She also enjoys yogurt very much.

Today she got to enjoy this wholesome Banana Oatmeal treat.  She loved them and finished two in no time.  Seeing her enjoy her treat puts a smile on my face.  Pawparents, if your dog doesn’t have any allergies to these ingredients, I highly recommend you to try this simple yet delicious treat.  You may like to check with your veterinarian if you have any questions about homemade treats before giving them to your furkids.

dogtreat2


Banana Oatmeal Dog Treats

Ingredients (makes 1 dozen) :

  • 1 over-riped banana
  • 1 cup oats
  • 2 tablespoons coconut oil

Directions:

  1. Preheat oven to 175 degrees celcius.
  2. Line a cookie sheet with parchment paper.
  3. Into a large bowl add oats, coconut oil and banana.
  4. Use a fork to mash the banana and then mix everything together till well incorporated.
  5. Spoon mixture onto lined cookie sheet.  Slightly flatten each dough with the back of the spoon.
  6. Bake in preheated oven for 15 minutes or till the cookies turn golden brown.
  7. Let them cool completely and they are ready for your furkids.
  8. Store the treats in an air-tight jar or container and finish within three days as they will not keep long without any preservatives.  If cookies seem soft the next day, crisp them in a toaster oven for a few minutes.

dogtreat3

dogtreat1

Cookie does very well in staying and waiting for her food.  She was taking a sniff at the treats.  I quickly snapped some shots and rewarded her with the treats!  Sorry to keep you waiting, Sweetpie!

dogtreat4

Enjoy 

Homemade Peanut Butter Granola

Do you look forward to breakfast each morning?  I do, because I get peckish around one hour after waking up.  I can’t do without breakfast.  My concentration dips when I haven’t eaten.  I need to kick-start my engine with some breakfast food and a cup of coffee.  I start my mornings with a glass of water.   An hour later, I will have my breakfast, usually a sandwich or muffin with coffee.  I have a coffee addiction so coffee with milk is a must.  Once that’s done, I have the energy to work my way through the morning.

I love making bread and muffins for breakfast.  But recently, I was hoping to make some granola to go with yogurt and fruit for breakfast.  I’m trying to incorporate more whole grains into our diet and I think adding oats into our breakfast is a great way to healthier eating.

Oats are a good source of carbohydrates, fibre, important vitamins, minerals and anti-oxidants.  They are gluten-free whole grains and they contain more protein and fat than most other grains.  Some of the benefits of eating oats include lowering blood sugar and cholesterol levels, protection against skin irritation and reduced constipation.  Since oats is very filling, it is also a weight-loss friendly food.

In this easy homemade granola recipe, I added peanut butter to the mix because we love peanut butter.  I also added some chopped almonds.  This is optional.  I had some leftover almonds and I thought it would give a nice crunchy texture and added nutty flavour.

granola5

Homemade Peanut Butter Granola

Ingredients:

  • 2 cups old fashioned oats
  • 1/2 teaspoon ground cinnamon
  • 1/4 teaspoon salt
  • 1/4 cup chopped almonds
  • 1/4 cup natural peanut butter
  • 1/4 cup honey
  • 1/2 teaspoon vanilla

Directions:

  1. Preheat oven to 160 degrees celcius.
  2. Line a large cookie sheet with parchment paper.  Set aside.
  3. In a large bowl, mix together oats, almonds, cinnamon and salt.  Set aside.
  4. In a microwave-safe dish or over the stove top, melt peanut butter and honey together till you get a smooth consistency.
  5. Remove from heat and stir in vanilla.
  6. Add peanut butter and honey mixture into dry ingredients and stir till well combined.
  7. Spread mixture on lined cookie sheet.
  8. Bake in preheated oven for 20 minutes or until granola is lightly browned.  Halfway through baking, stir the granola to get even cooking and browning.
  9. Remove from oven and allow it to cool completely.
  10. Store in air-tight jar.

granola6

I was happy with the result of the granola.  It was crunchy, lightly sweet and nutty.  I had a hearty breakfast of yogurt and blueberries topped with granola.  It was delicious and filling.  The best thing was that it was nutritious.  I stored the granola in a glass jar and I think it will be gone in no time since there are so many ways to eat granola.   It can be eaten on its own or with milk.  It can also be a topping for fudge, added to a peanut butter sandwich or parfait, or even used in baking cookies, bars or cake etc.  The good thing is that it is so easy to put together a fresh batch anytime because the ingredients and steps are very simple.   I hope you enjoy this granola as much as I did 


Chocolate Muffins

chocmuffin1

I had some cocoa that was expiring soon.  I needed to make something for an afternoon snack.  And I realised I didn’t have much time left before my daughter came home.  So I decided quickly to make chocolate muffins that would be ready within one hour.  Muffins are easy to make because you just have to mix dry and wet ingredients together.  They are good for breakfast and a snack to go.  I am not a fan of muffins.  I’d rather go for a chiffon cake.  But after I tried these chocolate muffins, I was sure I would make them again.  When they were baking, the house was filled with the aroma of chocolate.  My senses brought me to those times when I walk by the Famous Amos cookie store.  When I finally had time to try one, I was happy that the taste didn’t disappoint.  It tasted so wonderful, thanks to the cocoa and the coconut oil.

I decided at the last minute to use coconut oil for these muffins.  Baking with coconut oil is great.  The bakes always turn out so aromatic and fragrant.  Coconut oil is also a healthier option than melted butter and vegetable oil.  Coconut oil is high in natural saturated fats. Saturated fats not only increase the healthy cholesterol (known as HDL cholesterol) in your body, but also help convert the LDL “bad” cholesterol into good cholesterols.  By increasing the HDL in the body, it helps promote heart health and lower the risk of heart disease.

The amount of coconut oil used in this recipe doesn’t leave the muffins with a strong coconut taste.  In fact, it is so subtle you can’t really taste it and it blends so well with the cocoa.  I love taking a whiff out of the coconut oil jar.  It’s such a natural fragrance!  This recipe works well with vegetable oil if you don’t have coconut oil.  You can use any light tasting vegetable oil.   The result will be great as well.  You can top this with semi-sweet chocolate chips if you want to up the level of chocolate.  This recipe is really great if you are in a hurry.  I had these done in 45 minutes.  So busy moms, this is for you.

Ingredients (for 6 muffins)

Dry ingredients:

  • 100g all-purpose flour
  • 20g unsweetened cocoa
  • 1/2 teaspoon baking powder
  • 1/4 teaspoon baking soda
  • pinch of salt

Wet ingredients:

  • 1 egg, room temperature
  • 50g brown sugar
  • 50ml milk
  • 40ml coconut oil/vegetable oil
  • 1 teaspoon vanilla

Directions:

  1. Pre-heat oven to 175 degrees celcius.
  2. Fill muffin tin with cupcake liners.
  3. Sift dry ingredients (all-purpose flour, cocoa, baking powder, baking soda and salt) into a bowl.  Set aside.
  4. In a separate bowl, whisk egg and brown sugar together till light and fluffy.
  5. Add milk and continue whisking.  Next, add in vanilla and coconut oil and whisk them together till well incorporated.
  6. Make a well in the centre of the dry ingredients with a spatula.
  7. Pour in wet ingredients into the well.  Fold wet ingredients and dry ingredients till well incorporated with no traces of flour.  Make light and quick folds and do not over-fold as this will result in tough muffins.
  8. Spoon batter into cupcake liners till 2/3 full.
  9. Bake in pre-heated oven for 20 minutes.
  10. Allow the muffins to cool and then enjoy!

chocmuffin2

chocmuffin3

Curry Chicken

curry1

It’s been rainy and cool these days and I really enjoy the beautiful weather these two months have brought us.  It’s such a welcome change since it’s hot and humid all throughout the year in Singapore.  We are having 25 degrees celcius now against the usual 34 degrees celcius.   The dog has been making use of the nice cool weather for naps and cozying on the sofa.  Usually, she’d prefer to lay on the floor because of our warm weather.  Let’s appreciate this now because it will be back to the heat in February.

I cooked curry chicken for dinner because it is one of our favourite dishes, plus it is a nice dish to eat in this cool weather.  I always have a packet of curry powder in my pantry because we can’t live without curry chicken.  I cook it once in two weeks.  It’s delicious and we seldom have leftovers for this dish.  When cooking curry chicken, be sure to buy curry powder for cooking meats because there is a different type of curry powder for cooking curry fish.  I have both in my pantry.  We also love curry fish.

curry3

There are many curry chicken recipes.  Some recipes require blending spices from scratch to make rempah, a Malay word for spice paste.  The typical ingredients for making rempah are red chillies, shallots, lemongrass, tumeric, candlenuts, blue ginger and shrimp paste.  The Nyonya-style (aka Peranakan) curries are prepared with rempah.  Other recipes require curry powder which is available in packets at supermarkets and is not as time intensive as making rempah.  I have cooked Nyonya-style curry several times but today’s recipe is one that is made with curry powder because I happen to have all the ingredients on hand.  This turned out so delicious it was finished in one sitting.

When cooking curry, it is a must to have curry leaves because it gives the curry its distinct flavour.  Besides being natural flavouring agents,  curry leaves have a lot of health properties.  They contain antioxidant properties and is able to help control diarrhoea, indigestion, diabetes, peptic ulcers and an unhealthy cholesterol balance.  To prep the curry leaves to cook curry, wash and pat them dry and set aside.


Curry leaves


Curry Chicken

Ingredients:

3 chicken thighs, chopped into smaller pieces

1 potato*

3 tablespoons cooking oil

10 shallots

4 cloves garlic

1 stick cinnamon

6 tablespoons curry powder

1 cup coconut milk

2 cups water

1 stalk curry leaves

salt to taste

* Do not use russet potatoes as they tend to soften and break up. Wash, peel and quarter potato.  Soak them in a little salt water to prevent them from browning.  Set aside for use later. 

Directions:

  1. Blend shallots and garlic in a blender.
  2. Heat up a pot with 3 tablespoons cooking oil.  Pour in blended ingredients and curry leaves and cook over low heat for 10 minutes.
  3. Add in water, slowly add in chicken and potato and cook for about 10 minutes.
  4. Add curry powder and cinnamon.  Pour in coconut milk.  Add salt to taste.  Cook for another 10 minutes and it is ready.


curry2

Serve with either one of these: steamed rice, briyani rice, naan, roti prata or bread

Mixed Berries Yogurt Muffins

yogurtmuffins1

I always think muffins when I need to whip up something fuss-free for breakfast.  Everything can be done in one hour, from preparation to getting the muffins out of the oven.  I also like that the ingredients are few and there are only two bowls to wash at the end of the preparation.  Great for busy or lazy days.

For today’s muffins, I used the mixed berries yogurt that has been in my fridge for two weeks now.  I was not into chocolate this time because I preferred something fresh and perky for the morning.  Too bad I didn’t have fresh blueberries or strawberries to add because ideally it would be more wholesome with real fruit.  I went ahead to whip up the muffins without the fresh berries.  One hour later with all my bowls and utensils washed, the muffins were ready!

I did a taste test after they were cooled ten minutes.  They were very fluffy and moist, and they had the right amount of sweetness and tartness.  Looks wise, they didn’t appear too pretty.  Well, muffins never looked pretty anyway.  But they are healthy and delicious.  These are good to pack for work and school.  You can make bigger batches to freeze so you have something for breakfast or tea when you don’t have time to make any.  Simply thaw and warm up in the oven.

Mixed Berries Yogurt Muffins

Ingredients (for 6 muffins):

120g all-purpose flour

1 teaspoon baking powder

1/2 teaspoon baking soda

1/4 teaspoon salt

1 egg, at room temperature

40g caster sugar

140g mixed berries yogurt

30g vegetable oil (I used canola oil)

1 teaspoon vanilla

2 teaspoons lemon juice

1 teaspoon lemond rind

Directions: 

  1. Preheat oven to 175 degrees celcius.
  2. Line muffin tin with cupcake liners.
  3. Prepare dry ingredients – Sift all-purpose flour, baking powder, baking soda and salt into a mixing bowl.  Set aside.
  4. Prepare wet ingredients – In a separate mixing bowl, using a hand whisk, whisk egg and sugar together till light and fluffy.
  5. Add yogurt and continue whisking.  Add in vanilla, lemon juice and vegetable oil and mix well after each addition.
  6. Lastly, add lemon rind and incorporate well.
  7. Using a spatula, make a well in the centre of the flour mixture.  Pour in wet ingredients and fold the wet ingredients and dry ingredients.  Fold till both are incorporated well and there are no traces of flour.  Do not over-fold as this will result in tough muffins.  If you are adding fresh berries, coat them with a little flour and fold them in at this stage.
  8. Spoon batter into cupcake liners.  Sprinkle tops with lemon rind (optional).
  9. Bake in preheated oven for 20 minutes or tops are golden brown.  Test for doneness by inserting a skewer in the centre of the muffin.  When done, the skewer should come out clean.

yogurtmuffins4

Have a happy breakfast!

Soft Wholemeal Loaf Bread


wholemeal loaf4

I love my bread machine.  Guess some of you know that already.  I blogged about making bread some time ago.  You can read the post here Loving the bread machine.  That said, there is one thing I don’t like about my bread machine.  There is a problem every time I bake loaf breads in the machine.  You see, it has to do with the blade in the bread pan.  When the loaf is baked in the bread machine, there will be an unsightly hole at the base of the loaf.  When I slice the loaf there will be at least two slices with a hole.  One way to get around this is to remove the blade after kneading is completed and continue to let the bread bake in the bread machine and another is to remove the dough, proof and bake it in the oven.  I chose the latter as I wanted to try shaping it and baking in a loaf tin.

I made a loaf of soft wholemeal bread yesterday.  I loved the outcome of the loaf.  It was soft, fluffy and delicious.  It was easy to make and didn’t require many ingredients or steps.  I had planned to make white bread but at the last minute decided to add a bit of wholemeal flour.  My daughter is not a fan of wholemeal bread so I had to sneak a little in to get her to start liking it bit by bit.  Well, she ate it without even asking me why it’s not white.  I made some egg mayo and she enjoyed a good old egg sandwich as an after school snack.

Though I made this loaf with the help of my bread machine, you can also make it by hand or with an electric mixer with a dough hook.  If you are making by hand, you just need to combine everything and form a dough, knead it for ten minutes, then knead the butter into the dough and continue until the dough doesn’t stick to your hands.  I had a very aching arm when I tried making bread dough by hand because it does take quite of lot of time and strength for the dough to reach the stage whereby it is elastic and not sticky.  It’s better to use an electric mixer, attach a dough hook and let the mixer do the hard work for you.  Add everything into the bowl of the mixer, except for butter which is to be added ten minutes later when everything has been incorporated.

Soft Wholemeal Loaf Bread

Ingredients:

195g bread flour

55g wholemeal flour

2 tablespoons caster sugar

1 tablespoon milk powder

1 teaspoon salt

1 teaspoon instant yeast

20g unsalted butter

170ml cold water

Directions:

  1. Add ingredients following your bread machine’s instructions and set to dough function.
  2. Remove dough from bread machine when kneading is completed.  Place dough in a slightly oiled bowl and cover with cling wrap.  Let it proof for one hour.
  3. Prepare a loaf tin by lining it with parchment paper or lightly greasing the tin.
  4. After one hour, test if the dough has proofed properly by depressing the dough with a finger.  It should form a deep indentation on the dough and the depression should stay.  There shouldn’t be any dough sticking to the finger you used.
  5. Transfer dough to a lightly floured work surface and knead the dough by hand for about five minutes.  This is to expel the trapped gas in the dough.
  6. Next, divide the dough into three equal portions.
  7. Lightly dust your hands and rolling pin with flour.  Flatten each portion of dough with the rolling pin into an oval shape.  Roll the dough from the base of the oval all the way up.  Place the dough into the loaf tin.  Repeat till all three portions are done.
  8. Cover the loaf tin with cling wrap and let it rest for 10 minutes.
  9. After ten minutes, repeat process in Step 7.  Place the rolled up dough into the loaf tin and let it proof a second time.  Cover the dough with cling wrap.  The second proofing will take one hour.
  10. After one hour is up, you will notice that the dough has doubled in size.
  11. Pre-heat the oven to 180 degrees celcius.
  12. Brush a little milk on the top of the dough and bake in pre-heated oven for about 15 minutes.
  13. Remove the loaf tin from the oven and let it cool for 10 minutes before removing the loaf and transferring to a wire rack to cool completely.
  14. Slice with a sharp knife and enjoy the homemade freshness!

wholemeal loaf6


Japanese Cheesecake

I’m baking a super soft, smooth, melt-in-the-mouth, delicious, light cheesecake for my daughter today.  She’s getting a little bit of blues having to go back to school after the long school holiday break.  I hope she cheers up because this is her favourite cake.  She loves all things chilled.  And this cake is perfect when chilled.  It’s so delicious and light it’s hard to stop at one slice.   It’s an absolute winner in our family.  I’m looking forward to having a relaxing tea time with my gal.

The method in which this cake is made is similar to a chiffon cake.  You will need to mix meringue into the egg yolk batter.  Patience is required to enjoy a slice of Japanese cheesecake.  From preparation to baking, to slicing the cake takes a few hours.  But I think it is worth it because it is so heavenly.  You need to set aside time to melt the cream cheese, let it cool and pass it through a strainer, prepare the meringue and let the cake bake for one hour then cool for another 1 to 11/2 hours before you can serve it.  If you intend to make this for a party, it will be better to prepare it one day before so you have time to chill it in the fridge.

cheesecake2

Japanese Cheesecake

Ingredients (for an 8 inch cake):

250g cream cheese

50g unsalted butter

50g milk


6 egg yolks, at room temperature

50g milk

60g cake flour

20g corn flour

1/2 teaspoon salt


3 egg whites, at room temperature

1/4 teaspoon cream of tartar

140g caster sugar


Directions:

  1. Preheat oven to 150 degrees celcius.
  2. Over a bain marie/double boiler, melt cream cheese, butter and milk together to get a smooth creamy consistency.  Use a wooden spoon to stir the mixture.  When done, remove from the double boiler and leave to cool.
  3. In a mixing bowl, beat the egg yolks with a hand whisk lightly.  Add milk and continue to whisk lightly.
  4. Sieve in cake flour, corn flour and salt into the egg yolk mixture.  Fold to incorporate well.
  5. Pass the cream cheese mixture that has cooled through a strainer/sieve for a smoother consistency and to remove lumps from the mixture.  Note: This step is important for a smooth and velvety cake.
  6. Fold the cream cheese mixture into the egg yolk mixture till everything is well incorporated.
  7. In a separate mixing bowl and with an electric mixer, beat egg whites till foamy.  Add in cream of tartar and continue beating.  Add sugar in three additions to the egg whites and beat till soft peaks are achieved.
  8. Mix 1/3 of the meringue with the egg yolk and cream cheese batter, then fold the rest of the meringue into the batter.   Make sure everything is well combined.
  9. Pour into an 8 inch cake pan lined with parchment paper at the bottom.  Tap the cake pan against the counter a few times to release any air bubbles.
  10. Prepare water bath by adding about 1 inch of hot water into a big cake pan (must be larger than the cake pan you are using for the batter).  Then put the 8 inch cake pan into the bigger cake pan with hot water.
  11. Bake in pre-heated oven for one hour.
  12. At the end of one hour, turn off the oven and let the cake stay inside the oven with the door closed for 30 minutes.  Do not open the oven door as the sudden change in temperature will cause the cake to shrink.
  13. After 30 minutes, open the oven door slightly to allow the cake to cool in the oven.  Leave the cake in the oven for one hour.
  14. After one hour has passed, take the cake out and let it cool on a wire rack.
  15. Once the cake has been cooled completely, slice with a sharp knife.  Clean the knife with a kitchen towel after each slice for clean and presentable slices.
  16. Store them in air-tight containers and chill them in the fridge.
cheesecake3
Melting cream cheese, butter and milk over a double boiler
cheesecake4
Cooling the cream cheese mixture.  Notice that the consistency is lumpy so it will have to be strained for smooth consistency.
cheesecake5
Meringue with soft peaks


cheesecake6
Water bath (sorry, the water can’t be seen from the picture)

And this is how my cake turned out:

cheesecake1

Oops, this is real life!  A cake with cracks on the top.  I dusted the top with some icing sugar to make it look a little better.  Don’t think it worked though.  But trust me, it is true when they say don’t judge a book by its cover.  This is super yummy, soft, smooth, cottony, and not overly sweet.

Have a nice day!


Chocolate Macarons

macaronspic1

Macarons, you’re beautiful but too hard for me to understand.  I love to look at your “feet” and your coloured smooth “faces”.  You are sweet to the taste buds but too fickle and difficult sometimes.  And I am sorry that I have to give up after too much wasted ingredients.  At least for now.  I feel sorry for wasting resources.

I’ve only had two successes in making macarons.  Both times are chocolate macarons.  Though the ingredients for macarons are few, it requires technique to get the batter right.  After my success with chocolate macarons, I took the next step to make coloured ones.  I tried making green and pink ones but they turned out disastrous!  No feet, cracked and flat!  So after many wasted tries, I’ve stopped making them.  It’s nerve wrecking each time I stand in front of the oven anticipating feet.  I still haven’t figured out why I failed.  I think I just haven’t mastered the macaronage well or the shells aren’t dried out completely before I sent them to the oven.  Macaronage is the stage in preparing French macaron shells where the batter is worked until smooth, shiny and flowing.  I don’t know when I will make macarons again. Hopefully soon! I admire those who are able to make batches after batches of macarons, all in different colours and fillings.  They are amazing!

Chocolate Macarons

Ingredients:

100g icing sugar

50g almond powder

25g unsweetened dutch-processed cocoa powder

2 large egg whites, room temperature

65g caster sugar

Directions:

  1. Preheat oven to 150 degree celcius.
  2. Line 2 baking trays with parchment paper and have a pastry bag with a plain tip (about 1/2 inch) ready.
  3. Grind together icing sugar with almond powder and cocoa powder so there are no lumps, using a blender or food processor.
  4. Sieve the mixture to further ensure there are no lumps and that mixture is very fine.
  5. In a bowl of a standing electric mixer, beat the egg whites till they are foamy.  Add sugar in 4 batches and whip egg whites till they are very stiff and firm.
  6. Carefully fold in the dry ingredients in 2 batches into the egg white mixture with a rubber spatula.  When the mixture is just smooth and there are no streaks of egg white, stop folding and scrape the batter into the pastry bag (standing the bag in a tall glass helps if you’re alone).
  7. Pipe the batter on the parchment-lined baking trays in 1-inch circles (about 1 tablespoon each of batter), evenly spaced one-inch apart.
  8. Tap the baking trays a few times firmly on the counter to flatten the batter then let the macaron batter dry out so that when you touch the surface, it doesn’t stick to your finger.  This takes around one hour.
  9. When the surface of the macaron batter is dry, bake them for 15-18 minutes.  Let them cool completely then remove from baking tray.
  10. Pipe your choice of filling and enjoy!

Filling:

1 portion of Nutella or Vanilla Buttercream

Vanilla Buttercream Filling

Ingredients:

56g unsalted butter

90g icing sugar

1 teaspoon milk

1/2 teaspoon vanilla extract

Directions:

  1. Using a hand mixer or a stand mixer, cream butter until soft and smooth.
  2. Add powdered sugar, milk, and vanilla and mix until light and fluffy.


macaronspic2


macaronspic3

Recipe for macaron shells with slight modifications from http://www.davidlebovitz.com

Recipe for vanilla buttercream from http://www.aheadofthyme.com


Homemade tomato puree

A fresh jar of tomato puree.  A versatile base for pasta sauce, pizzas, curries, noodles etc.  It’s easy to make and it can be stored in the fridge or freezer for use later.

tomato puree2

On days when I’m in a hurry I always end up making a bowl of noodles to satisfy my rumbling tummy.  That’s when I reach out for this jar.  I mix about two tablespoons of tomato puree with a dash of soy sauce, oyster sauce and sesame oil, boil egg noodles and mix them together.  It’s delicious because they come together so well.  It’s also healthier than reaching out for instant noodles.

There are so many uses for tomato puree.  I’m planning to make a bigger batch of puree for making pasta sauce.   When you see red, plump tomatoes in your supermarket, think of homemade tomato puree.  Think also of the many nutrients in this superfood.  Tomatoes are rich in the antioxidant lycopene, which has been linked to many health benefits, including reduced risk of heart disease and cancer.  They are also a great source of vitamin C, potassium, folate and vitamin K.

tomato puree4

Tomato Puree

Ingredients:

5 ripened tomatoes

11/2 tablespoons olive oil

1 teaspoon vinegar (optional, use if you want a longer shelf life)

Directions:

  1. Wash tomatoes thoroughly and make a small incision at the top of each.
  2. Add tomatoes into a pot of boiling water and let them boil over medium flame for 7 – 9 minutes.
  3. Prepare a bowl of iced water.  When tomatoes are done boiling, turn off the flame and transfer them into the bowl of iced water.
  4. After they are cooled, peel off the skins of the tomatoes and discard.  This can be done easily with the incision made beforehand.  The boiling loosens the skins and makes peeling very easy.
  5. Cut the tomatoes into large chunks and transfer them into a blender or processor to puree them.  For a seedless puree, strain the puree before going to the next step.
  6. In a saucepan or pot, heat olive oil over medium flame.  Add tomato puree and stir to mix.  Let it come to a boil and then let it simmer.  Stir occasionally.  Add vinegar if you would like a longer shelf life.  Let it simmer for around 30 – 45 minutes if you like a thicker consistency.
  7. Allow the puree to cool completely before transferring into a jar.  Refrigerate the jar of tomato puree.

tomato puree1

tomato puree3

The puree I made turned out orangey rather than reddish.  To get a richer colour, I will try using redder tomatoes.  Nevertheless, I’m happy with it 🙂

recipe inspired by: ruchiskitchen.com